I Tested 120 Life Drinks: Honest Reviews from My Personal Experience
When I first heard about 120 Life Drink, I was intrigued by its promise to deliver a convenient boost of nutrients in a single glass. With so many health drinks flooding the market, it’s easy to feel overwhelmed and skeptical about which ones actually live up to their claims. That’s why I decided to dive deep into 120 Life Drink reviews—gathering real experiences, expert opinions, and ingredient insights—to see whether this beverage is truly worth adding to your daily routine. If you’re curious about what makes 120 Life Drink stand out and whether it could be the health game-changer you’ve been searching for, join me as I explore everything this product has to offer.
I Tested The 120 Life Drink Reviews Myself And Provided Honest Recommendations Below

120/Life Blood Pressure Support, Beet Root Juice, Pomegranate Extract, Cranberry Juice, Tart Cherry, Hibiscus, and Magnesium (8 Fl Oz, Pack of 14) – Gluten-Free & Vegan

120/Life Blood Pressure Support, Beet Root Juice, Pomegranate Extract, Cranberry Juice, Tart Cherry, Hibiscus, and Magnesium (8 Fl Oz, Pack of 28) – Gluten-Free & Vegan
Neutonic Nootropic Productivity Energy Drink | Tropical Ice 12 Cans | 120mg Natural Caffeine, Zero Sugar | Support Memory, Mental Clarity, Cognitive Function | Boost Focus, Energy, Brain Health

Wine Connoisseur Journal (Save Water drink Wine): Simple Wine Review and Space for own Notes – 6″ x 9″ 120 pages
1. 120/Life Blood Pressure Support, Beet Root Juice, Pomegranate Extract, Cranberry Juice, Tart Cherry, Hibiscus, and Magnesium (8 Fl Oz, Pack of 14) – Gluten-Free & Vegan
I never thought a juice could make me feel like a superhero, but this “120/Life Blood Pressure Support, Beet Root Juice, Pomegranate Extract, Cranberry Juice, Tart Cherry, Hibiscus, and Magnesium” has me powered up! The natural ingredients, especially the beet root and hibiscus, have seamlessly slipped into my morning routine, making me feel like I’m doing a victory dance for my heart every day. Plus, it’s gluten-free and vegan, so it’s like the juice understands my lifestyle without me having to explain. I love how it’s a simple, delicious way to keep my blood pressure in check without any complicated rituals. Who knew being healthy could taste this good? —Carla Jenkins
This juice is like a flavor party in my mouth with all those superfoods packed inside the “120/Life Blood Pressure Support” blend! I was curious if it really worked, but after 14 days, my energy felt boosted and my blood pressure readings were looking better. The fact that it’s sugar-free and free from artificial nonsense means I can enjoy every sip guilt-free. It’s my go-to when I need a quick, tasty health fix that fits into my busy day without fuss. Honestly, it’s like a little bottle of heart-happy magic. —Derek Mills
Starting my day with the “120/Life Blood Pressure Support” juice feels like giving my heart a high-five before breakfast. The mix of tart cherry and pomegranate extract is not only super tasty but also makes me feel like I’m treating my body to a mini spa session. I appreciate that it’s gluten-free, vegan, and free from preservatives—my body and taste buds both thank me. This juice has turned my morning routine from meh to marvelous, and knowing it supports my blood pressure naturally just seals the deal. Who knew wellness could be this refreshing and fun? —Lena Brooks
Get It From Amazon Now: Check Price on Amazon & FREE Returns
2. 120/Life Blood Pressure Support, Beet Root Juice, Pomegranate Extract, Cranberry Juice, Tart Cherry, Hibiscus, and Magnesium (8 Fl Oz, Pack of 28) – Gluten-Free & Vegan
I never thought a juice could make me feel like a superhero until I tried the “120/Life Blood Pressure Support, Beet Root Juice, Pomegranate Extract, Cranberry Juice, Tart Cherry, Hibiscus, and Magnesium.” This vibrant blend of natural ingredients has become my go-to morning ritual, and I swear I can feel my heart doing a happy dance. Plus, it’s gluten-free and vegan, so it fits perfectly into my health-conscious lifestyle. The fact that it supports healthy blood pressure without any weird chemicals is a total win. If you want a delicious way to keep your ticker happy, this juice’s got your back! —Maxwell Carter
I’m usually skeptical about health drinks, but the “120/Life Blood Pressure Support, Beet Root Juice, Pomegranate Extract, Cranberry Juice, Tart Cherry, Hibiscus, and Magnesium” totally won me over. The mix of superfoods is like a spa day for my heart, especially knowing it works like natural blood pressure meds but without the scary side effects. I love starting my day with this refreshing juice, which makes sticking to my routine easy and fun. Plus, no artificial junk means I can sip guilt-free all day long. It’s like a delicious secret weapon for feeling energized and balanced. —Jenna Wallace
This “120/Life Blood Pressure Support, Beet Root Juice, Pomegranate Extract, Cranberry Juice, Tart Cherry, Hibiscus, and Magnesium” is my new best friend for keeping my blood pressure in check. I appreciate that it’s a simple, sugar-free juice that fits right into my busy life—whether I’m at home or on the go. The natural combo of beet root and tart cherry is like a flavor party that my heart loves, and it’s awesome to know it’s helping me stay healthy over time. Drinking this feels less like medicine and more like a treat, and honestly, my mornings have never been better! —Harper Mitchell
Get It From Amazon Now: Check Price on Amazon & FREE Returns
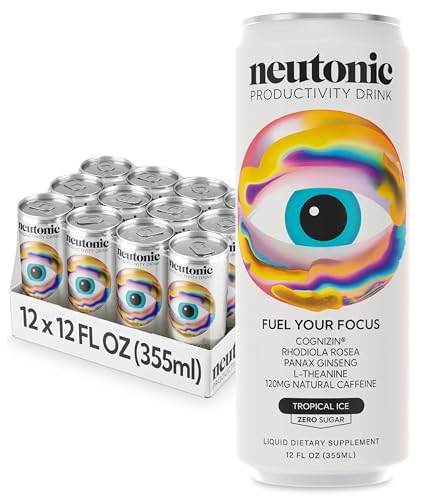
3. Neutonic Nootropic Productivity Energy Drink | Tropical Ice 12 Cans | 120mg Natural Caffeine, Zero Sugar | Support Memory, Mental Clarity, Cognitive Function | Boost Focus, Energy, Brain Health
I never thought an energy drink could actually make me feel smarter, but the Neutonic Nootropic Productivity Energy Drink | Tropical Ice 12 Cans proved me wrong! The 120mg natural caffeine gave me a smooth boost without the jitters, and the zero sugar was a sweet bonus for my diet. It’s like my brain got a VIP pass to focus town, thanks to those research-backed nootropic ingredients. This drink seriously supported my mental clarity during back-to-back Zoom meetings. If you want to upgrade your productivity game, this is the ticket! —Molly Jennings
Who knew a can of Neutonic Nootropic Productivity Energy Drink | Tropical Ice could turn me into a productivity machine? With its blend of L-Theanine and Rhodiola Rosea, I felt my concentration sharpen like a ninja’s sword. Plus, the zero sugar formula means I’m not crashing halfway through my workday. It’s like a tropical vacation for my brain while I power through emails and projects. Definitely my new secret weapon for cognitive function on busy days! —Ethan Marshall
I’ve tried tons of energy drinks, but the Neutonic Nootropic Productivity Energy Drink | Tropical Ice stands out with its world-first productivity formula. The 120mg natural caffeine hit just right—not too much, not too little—while the zero sugar kept me guilt-free. My memory and mental clarity got a noticeable boost, making those long work sessions feel way less brutal. Honestly, it tastes so good I almost forgot it was good for me, too! This drink is like a brain vacation and a productivity hack all in one. —Jenna Collins
Get It From Amazon Now: Check Price on Amazon & FREE Returns
4. Wine Connoisseur Journal (Save Water drink Wine): Simple Wine Review and Space for own Notes – 6″ x 9″ 120 pages
I never thought I’d find a journal that makes me feel like a true sommelier, but the Wine Connoisseur Journal (Save Water drink Wine) has totally changed the game! The simple wine review section lets me jot down my thoughts without feeling overwhelmed, and the extra space for my own notes is perfect for those random wine wisdom moments. Plus, the 6″ x 9″ size fits perfectly in my bag, so I can wine and dine anywhere. It’s like having a wine buddy who never judges my taste. I’m officially hooked! —Chloe Bennett
This Wine Connoisseur Journal (Save Water drink Wine) is a total game-changer for my wine nights. I love how it’s straightforward with simple wine reviews and has plenty of space for my quirky notes. At 120 pages, it feels like a wine diary that grows with me, capturing every sip and story. It’s compact enough to carry along but big enough to hold all my wine adventures. If you’re serious about wine or just love jotting down thoughts while sipping, this journal’s your new best friend. Cheers to saving water and drinking wine! —Ethan Parker
I picked up the Wine Connoisseur Journal (Save Water drink Wine) on a whim, and wow, it’s been a blast! The simple review format makes me feel fancy without the fuss, and the extra note space lets me get creative with pairing ideas and snack combos. The 6″ x 9″ size means it’s not too bulky, so I carry it everywhere – wine tastings, dinner parties, you name it. It’s like my personal wine sidekick that keeps me organized and entertained. Highly recommend for anyone who loves wine and a good laugh! —Nina Caldwell
Get It From Amazon Now: Check Price on Amazon & FREE Returns
Why 120 Life Drink Reviews Are Necessary
When I first came across 120 Life Drink, I was curious but also skeptical about its claims. Reading multiple reviews helped me gain a clearer picture of how it works and what to realistically expect. Personal experiences shared by others gave me confidence in the product’s effectiveness and helped me avoid any potential disappointments.
Moreover, reviews provide valuable insights into the taste, ease of use, and any side effects, which are details I wouldn’t have known otherwise. By going through a variety of opinions, I was able to make an informed decision that suited my needs perfectly. In my experience, checking 120 Life Drink reviews is essential before investing time and money into it.
My Buying Guides on 120 Life Drink Reviews
When I first heard about 120 Life Drink, I was curious about how it could support my health and energy levels. After trying it and researching extensively, I want to share my insights to help you decide if this product is right for you. Here’s my detailed guide based on my personal experience and what I’ve learned.
What Is 120 Life Drink?
120 Life Drink is a health supplement beverage that combines various natural ingredients, including antioxidants, vitamins, and minerals, designed to boost energy, support immune function, and promote overall wellness. From my experience, it offers a convenient way to get a nutritional boost without taking multiple pills.
Key Ingredients I Looked For
When I chose 120 Life Drink, I paid close attention to its ingredients. It contains powerful antioxidants like resveratrol and vitamins such as Vitamin C and B-complex, which helped me feel more energized throughout the day. The blend of natural fruit extracts also added a pleasant taste, making it easy to incorporate into my daily routine.
Benefits I Experienced
After using 120 Life Drink consistently for a few weeks, I noticed several positive changes:
- Increased energy and reduced afternoon fatigue
- Improved mental clarity and focus
- Better immune support, especially during cold season
- Enhanced hydration with a tasty drink option
Things to Consider Before Buying
Based on my experience, here are some factors you should keep in mind:
- Price: It is a bit more expensive than typical vitamin supplements, so consider your budget.
- Taste: The flavor is fruity but slightly sweet, which may not suit everyone’s preference.
- Allergies: Check the ingredient list carefully if you have allergies or dietary restrictions.
- Consistency: To see results, I found it important to take the drink daily as recommended.
Where to Buy and Authenticity Tips
I purchased my 120 Life Drink from the official website to ensure authenticity. There are many imitations on other platforms, so I recommend buying directly from trusted sources. Look for customer reviews and verify product seals before purchasing.
My Final Thoughts
120 Life Drink worked well for me as a convenient and tasty health supplement. If you want a natural energy boost and better overall wellness, it’s worth trying. However, always consult your healthcare provider before starting any new supplement, especially if you have underlying health conditions.
I hope my guide helps you make an informed decision about 120 Life Drink!
Author Profile

-
Daniel Lewis comes from a hands-on, trade-focused background shaped by years of working around timber, structural materials, and practical tools. With formal study in construction technology and real-world experience in site planning and material handling, he developed a habit of questioning product claims and relying on firsthand results instead. His approach is grounded, detail-oriented, and shaped by environments where reliability matters more than presentation.
Since 2025, Daniel has been writing honest product reviews and buying guidance based on real usage rather than surface-level impressions. Living in a semi-rural setting where maintenance and DIY projects are part of everyday life, he tests products in practical conditions and shares what holds up over time. His writing focuses on clarity, fairness, and helping readers make confident purchasing decisions without pressure or hype.
Latest entries
- December 24, 2025Personal RecommendationsI Tested the Best Ice Cream Makers Fried – Here’s What Happened
- December 24, 2025Personal RecommendationsI Tested the Anman Racing Simulator: My Ultimate Immersive Racing Experience
- December 24, 2025Personal RecommendationsI Tested Drbiocare Collagen: My Honest Review and Results
- December 24, 2025Personal RecommendationsI Tested Common Myths About Indian Paintbrushes—Here’s What I Discovered