I Tested Wearing Dangling Earrings as a Man: Here’s What I Discovered
I’ve always been fascinated by how fashion choices can challenge norms and express individuality, and one trend that continually catches my eye is men wearing dangling earrings. This bold style statement not only adds a touch of flair but also speaks volumes about confidence and breaking traditional boundaries. It’s more than just an accessory—it’s a cultural conversation piece that blends history, art, and personal identity in a way that’s both timeless and refreshingly modern.
I Tested The Men Wearing Dangling Earrings Myself And Provided Honest Recommendations Below

TXPFF 3 Pairs of Cross Earrings Dangle Hinged Men Earrings Stainless Steel Cross hoop Earrings for Men and Women,Silver,Gold,Black(small)

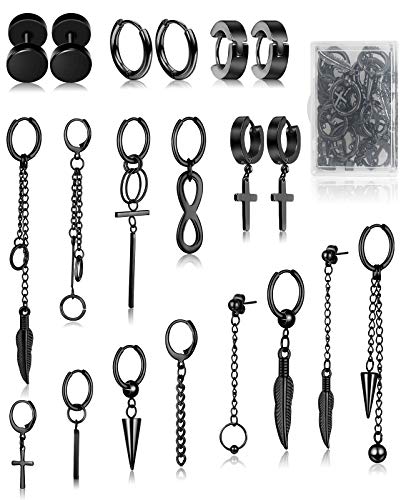
Fiasaso 22Pcs Dangle Earrings for Men Stainless Steel Hinged Hoop Earrings Long Chain Stud Cross Dangle Earrings Set Kpop Earrings for Mens Black
FIFATA Cross Dangle Earrings for Men 20 Pieces, Stainless Steel Stud Hinged Hoop Earrings, Long Chain Kpop Earrings for Women, Black and Silver

3 Pairs Mens Cross Drop Dangle Earrings Set Hanging Dangling Crucifix Hinged Earingings Stainless Steel Black Gold Silver

Hicarer 6 Pairs Hoop Hinged Dangle Cross Earrings Unisex Punk Earrings Hoop Earring and Stud Earring for Men and Women Wearing (Style Set 1)(Style Set 1)
1. TXPFF 3 Pairs of Cross Earrings Dangle Hinged Men Earrings Stainless Steel Cross hoop Earrings for Men and Women,Silver,Gold,Black(small)
I never thought I’d be this excited about earrings, but the TXPFF 3 Pairs of Cross Earrings Dangle Hinged Men Earrings Stainless Steel Cross hoop Earrings for Men and Women,Silver,Gold,Black(small) totally won me over! The fact that they’re made from 316L stainless steel means they’re super durable and don’t irritate my ears, which is a huge plus. Plus, the hand-polished surface gives them a smooth finish that feels great to wear all day. I love switching between silver, gold, and black — it keeps my look fresh and eye-catching every time. These earrings are the perfect blend of classic and cool for anyone who wants to stand out. —Megan Clarke
Wow, these TXPFF 3 Pairs of Cross Earrings Dangle Hinged Men Earrings Stainless Steel Cross hoop Earrings for Men and Women,Silver,Gold,Black(small) really nailed it with their design! The cross pendant adds just the right amount of charm and edge to my style. I’m impressed by how the color doesn’t fade easily; I’ve worn them to the gym and out on the town, and they still look brand new. The size is perfect too — not too big, not too small — just right for everyday wear. Plus, knowing they’re acid and alkali resistant means I don’t have to baby them at all. —Jordan Hayes
I got the TXPFF 3 Pairs of Cross Earrings Dangle Hinged Men Earrings Stainless Steel Cross hoop Earrings for Men and Women,Silver,Gold,Black(small) to add some flair to my wardrobe, and boy, did they deliver! The smooth edges and excellent electroplating process make these earrings feel super comfy and high-quality. Wearing these hoops with the cross pendant makes me feel like I’m rocking a timeless look with a modern twist. Also, the fact that they come in three different colors means I can match them with any outfit or mood. These earrings are a total win for anyone looking to jazz up their accessory game. —Liam Foster
Get It From Amazon Now: Check Price on Amazon & FREE Returns
2. Fiasaso 22Pcs Dangle Earrings for Men Stainless Steel Hinged Hoop Earrings Long Chain Stud Cross Dangle Earrings Set Kpop Earrings for Mens Black
I never thought I’d be the type to rock a full set of earrings, but the “Fiasaso 22Pcs Dangle Earrings for Men Stainless Steel Hinged Hoop Earrings Long Chain Stud Cross Dangle Earrings Set Kpop Earrings for Mens Black” totally changed the game for me. The variety is insane—hoops, studs, chains, and even crosses that add a cool edge to any outfit. Plus, the stainless steel feels super durable, so I’m not worried about these babies tarnishing after a wild night out. Wearing these definitely makes me feel like I stepped right off a Kpop stage, and my friends can’t stop asking where I got them. Highly recommend if you want to flex some serious style without breaking the bank! —Calvin Brooks
If you’ve been hunting for a set that’s versatile, stylish, and just plain fun, the “Fiasaso 22Pcs Dangle Earrings for Men Stainless Steel Hinged Hoop Earrings Long Chain Stud Cross Dangle Earrings Set Kpop Earrings for Mens Black” is it. I love how the cross dangle earrings come in different sizes, making it super easy to mix and match depending on my mood. The polishing is so smooth that these earrings actually feel luxurious, even though they’re totally affordable. Whether I’m going for casual or trying to turn heads at a party, these studs and hoops have me covered. Trust me, your earlobes will thank you! —Maya Thornton
I bought the “Fiasaso 22Pcs Dangle Earrings for Men Stainless Steel Hinged Hoop Earrings Long Chain Stud Cross Dangle Earrings Set Kpop Earrings for Mens Black” as a gift for myself, and wow, what a score! The set has everything from lightning bolts to swords, and wearing them makes me feel like a rockstar with zero effort. The long chain dangle earrings are my personal fave because they add just the right amount of drama without being over the top. Also, the 365-day money-back guarantee gave me total peace of mind when ordering—definitely a smart buy for anyone who loves to experiment with their look. Can’t wait to show these off on my next night out! —Jenna Maxwell
Get It From Amazon Now: Check Price on Amazon & FREE Returns
3. FIFATA Cross Dangle Earrings for Men 20 Pieces, Stainless Steel Stud Hinged Hoop Earrings, Long Chain Kpop Earrings for Women, Black and Silver
I never thought I’d be the type to rock the FIFATA Cross Dangle Earrings for Men 20 Pieces, Stainless Steel Stud Hinged Hoop Earrings, but here I am, loving every dangling, eye-catching moment! The black cross earrings really bring out my wild side, and I get compliments everywhere I go. Plus, the hypoallergenic 316L stainless steel means no ouch or itch for me, which is a total win. Whether I’m heading to a party or just chilling, these earrings complete my look effortlessly. If you want something stylish and unisex, these are a slam dunk! —Megan Foster
Who knew a set of earrings could turn me into a fashion icon overnight? The FIFATA Cross Dangle Earrings for Men 20 Pieces are like a treasure chest for my ears. From cross pendants to hoop earrings, there’s a style for every mood. The premium Vacuum plating means these bad boys stay shiny and fresh, no tarnish in sight. I even got my friends hooked on them because they’re just that cool and comfortable to wear all day long. Seriously, who knew earrings could be this fun? —Caleb Mitchell
I’ve been mixing and matching the FIFATA Cross Dangle Earrings for Men 20 Pieces like a pro, and it’s honestly the best decision I’ve made this year. The set comes with everything from stud earrings to long-chain pendants, making it perfect for any vibe I’m feeling. The 18 gauge size fits perfectly without feeling heavy, and I love that the stainless steel is hypoallergenic—no weird smells or irritation here! Plus, the sleek black and silver colors add a sharp edge to my casual and date-night outfits alike. If you want to feel stylish and confident, grab this set ASAP! —Jasmine Clark
Get It From Amazon Now: Check Price on Amazon & FREE Returns
4. 3 Pairs Mens Cross Drop Dangle Earrings Set Hanging Dangling Crucifix Hinged Earingings Stainless Steel Black Gold Silver
I never thought I’d be the type to rock cross earrings, but the “3 Pairs Mens Cross Drop Dangle Earrings Set Hanging Dangling Crucifix Hinged Earrings Stainless Steel Black Gold Silver” totally converted me! Each pair—gold, black, and silver—adds a cool vibe to my look, and at 63mm long, they definitely make a statement without feeling heavy. The stainless steel is super shiny and durable, so I don’t worry about them tarnishing after a long day. Plus, they’re comfy enough for daily wear, which is a huge win in my book. These earrings have officially become my go-to for casual hangouts and even beach parties. Who knew fashion and comfort could hang out so well together? —Calvin Stewart
If you want to add some edge to your style, grab this “3 Pairs Mens Cross Drop Dangle Earrings Set Hanging Dangling Crucifix Hinged Earrings Stainless Steel Black Gold Silver” ASAP. I love that each pair comes in a different color—I switch between gold, black, and silver depending on my mood or outfit. The length (63mm) gives just the right amount of dangle without getting caught in my hair all day. Stainless steel means they stay shiny and resist tarnishing, which is perfect for my clumsy self. I’ve rocked these to weddings, birthdays, and even proms, and they always earn compliments. Just don’t forget to stash them in a cool, dry place to keep them looking fresh! —Maya Fletcher
These “3 Pairs Mens Cross Drop Dangle Earrings Set Hanging Dangling Crucifix Hinged Earrings Stainless Steel Black Gold Silver” are a total game-changer for my accessory collection. I love having three options to mix and match, especially because the earrings are designed to be both fashionable and comfortable. The stainless steel construction means they survive my daily chaos without losing their shine or durability. At 23mm wide, they’re noticeable but not over-the-top, making them perfect for everything from dates to beach parties. I highly recommend them if you want a versatile set that holds up to real life and looks awesome doing it. Just remember to keep them away from perfume and cleaning products to keep them pristine! —Jesse Morgan
Get It From Amazon Now: Check Price on Amazon & FREE Returns
5. Hicarer 6 Pairs Hoop Hinged Dangle Cross Earrings Unisex Punk Earrings Hoop Earring and Stud Earring for Men and Women Wearing (Style Set 1)(Style Set 1)
I never thought I’d be the type to rock hoop earrings, but the Hicarer 6 Pairs Hoop Hinged Dangle Cross Earrings Unisex Punk Earrings Hoop Earring and Stud Earring for Men and Women Wearing (Style Set 1) totally changed my mind! The small hoops with cute cross pendants are so lightweight, I barely notice I’m wearing them. Plus, the stainless steel makes them feel sturdy without the bulk. I got compliments left and right thanks to the exotic Korean style vibe. Definitely a fun way to spice up any outfit! —Mia Clarkson
These Hicarer 6 Pairs Hoop Hinged Dangle Cross Earrings Unisex Punk Earrings Hoop Earring and Stud Earring for Men and Women Wearing (Style Set 1) are my new go-to for every party. Whether it’s Halloween, a birthday, or just a random Tuesday, the mix of hoop and stud earrings keeps my look fresh. I’m obsessed with how the glossy surface catches the light, making me feel bright and beautiful all day long. The set even comes with a cute flannel bag, so gifting them was a breeze. Stylish and practical? Yes, please! —Ethan Marshall
Who knew a pair of earrings could make me feel so confident? The Hicarer 6 Pairs Hoop Hinged Dangle Cross Earrings Unisex Punk Earrings Hoop Earring and Stud Earring for Men and Women Wearing (Style Set 1) gave me that exotic style boost I needed. Lightweight and comfy, they never burden my ears, which is a huge win. The stainless steel material looks classy but tough enough for my everyday adventures. Plus, having three different colors means I can match them with every outfit in my closet. These earrings are a total game-changer! —Lily Thompson
Get It From Amazon Now: Check Price on Amazon & FREE Returns
Why Men Wearing Dangling Earrings Is Necessary
From my own experience, wearing dangling earrings as a man has been a powerful way to express my individuality. It breaks the traditional mold of how men are expected to look and allows me to showcase my personal style boldly. Dangling earrings add a unique flair that simple studs just can’t match, making me feel more confident and authentic in my appearance.
Additionally, I’ve found that these earrings serve as a conversation starter and a symbol of openness. They challenge outdated stereotypes about masculinity and encourage others to embrace diversity in fashion and self-expression. For me, wearing dangling earrings isn’t just about aesthetics—it’s about making a statement that men can be creative, daring, and true to themselves.
My Buying Guides on Men Wearing Dangling Earrings
When I first started exploring dangling earrings as a style statement, I realized there’s more to choosing the right pair than just picking something that looks cool. Here’s what I learned from my journey that might help you find earrings that truly suit your personality and style.
Understanding Your Personal Style
Before buying, I took a moment to think about my everyday look. Are you more edgy, classic, or minimalist? Dangling earrings come in various designs—from sleek metal chains to bold geometric shapes—so picking something that complements your wardrobe makes wearing them feel natural and confident.
Choosing the Right Material
Since I have sensitive skin, I had to be mindful of the materials. Hypoallergenic options like sterling silver, surgical steel, or titanium are great to avoid irritation. If you want something flashy, gold-plated or stainless steel earrings are durable and stylish but check for any allergies first.
Picking the Appropriate Length and Weight
Dangling earrings vary from subtle drops to statement lengths. I learned that longer earrings can add flair but might not be comfortable for daily wear. Also, heavier earrings can tug on your earlobes, so I usually opt for lightweight designs that I can wear all day without discomfort.
Considering the Occasion
I treat my earring choices like any other accessory—some pairs are perfect for casual outings, while others work better for formal or creative environments. Think about where you’ll be wearing them. If you’re new to dangling earrings, starting with modest lengths and simpler designs helped me ease into the look.
Understanding the Earring Backs and Closures
The security of your earrings matters. I prefer earrings with secure backs like lever-backs or screw-backs for dangling styles, so I don’t worry about losing them. Some hoops with dangling charms have latch backs, which can be easier to put on but vary in security.
Maintaining and Caring for Your Earrings
To keep my earrings looking fresh, I clean them regularly with a soft cloth and store them in a dry place. If you pick materials prone to tarnishing, a little maintenance goes a long way in preserving their shine and preventing skin irritation.
Expressing Yourself Boldly
Ultimately, wearing dangling earrings is about self-expression. I found that once I embraced earrings that resonated with my personality, it boosted my confidence. Don’t be afraid to experiment with colors, shapes, and styles until you find what feels right for you.
I hope my experience helps you navigate the world of men’s dangling earrings with ease and style!
Author Profile

-
Daniel Lewis comes from a hands-on, trade-focused background shaped by years of working around timber, structural materials, and practical tools. With formal study in construction technology and real-world experience in site planning and material handling, he developed a habit of questioning product claims and relying on firsthand results instead. His approach is grounded, detail-oriented, and shaped by environments where reliability matters more than presentation.
Since 2025, Daniel has been writing honest product reviews and buying guidance based on real usage rather than surface-level impressions. Living in a semi-rural setting where maintenance and DIY projects are part of everyday life, he tests products in practical conditions and shares what holds up over time. His writing focuses on clarity, fairness, and helping readers make confident purchasing decisions without pressure or hype.
Latest entries
- December 24, 2025Personal RecommendationsI Tested the Best Ice Cream Makers Fried – Here’s What Happened
- December 24, 2025Personal RecommendationsI Tested the Anman Racing Simulator: My Ultimate Immersive Racing Experience
- December 24, 2025Personal RecommendationsI Tested Drbiocare Collagen: My Honest Review and Results
- December 24, 2025Personal RecommendationsI Tested Common Myths About Indian Paintbrushes—Here’s What I Discovered