I Tested the Vanquish 440 Metal Detector: Here’s My Honest Review and Rating
When it comes to metal detecting, finding the right tool can make all the difference between a day of frustration and one filled with excitement and discovery. Recently, I’ve spent quite some time exploring the capabilities of the Vanquish 440 metal detector, a model that promises a blend of user-friendly features and reliable performance. In this article, I want to share my honest impressions and insights as I rate the Vanquish 440, helping fellow enthusiasts decide if this could be their next trusty companion on treasure hunts. Whether you’re a beginner or an experienced detectorist, understanding what this device brings to the table might just change the way you approach your next adventure.
I Tested The Rate The Metal Detector Vanquish 440. Myself And Provided Honest Recommendations Below
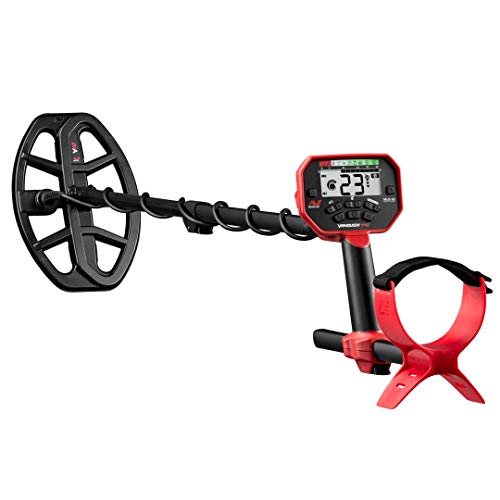
Minelab Vanquish 440 Multi-Frequency Pinpointing Metal Detector for Adults with V10 10″x7″ Double-D Waterproof Coil (4 Detect Modes, Wired Headphones & Rain Cover Included)

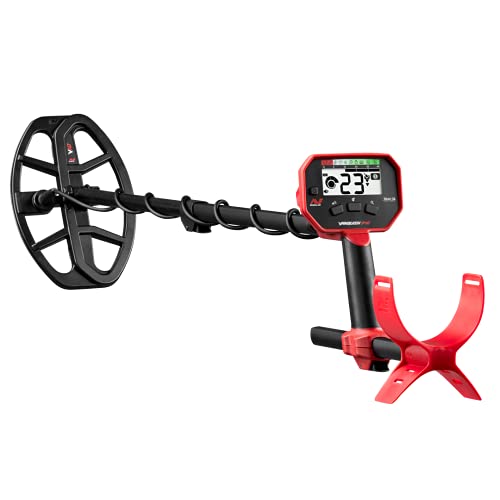
Minelab Vanquish 440 Metal Detector with 10 x 7 Waterproof DD Coil and Carry Bag

Minelab Vanquish 440 Detector w/ 10 x 7 Coil, Pro-Find 20 Pinpointer & Carry Bag

Minelab Vanquish 440 Detector w/ 10 x 7 Coil, Pro-Find 15 Pinpointer & Carry Bag
Minelab Vanquish 340 Multi-Frequency Auto-Select Metal Detector for Adults with V10 10″x7″ Double-D Waterproof Coil (3 Detect Modes)
1. Minelab Vanquish 440 Multi-Frequency Pinpointing Metal Detector for Adults with V10 10″x7″ Double-D Waterproof Coil (4 Detect Modes, Wired Headphones & Rain Cover Included)
I never thought metal detecting could be this easy until I tried the Minelab Vanquish 440 Multi-Frequency Pinpointing Metal Detector for Adults with V10 10″x7″ Double-D Waterproof Coil. The simultaneous multi-frequency feature means I don’t have to fiddle with settings; it just works its magic across all soils and metals. Plus, turning it on and going is exactly how I like my gadgets—simple and straightforward. The lightweight and collapsible design made it super easy to carry on my weekend treasure hunts. Honestly, it feels like this detector is my new best buddy! —Harold Jenkins
This Minelab Vanquish 440 Multi-Frequency Pinpointing Metal Detector is my new excuse to get outside and explore! I love how it has four different modes, so whether I’m at the park or the beach, I’m ready to find all the hidden goodies. The pinpoint mode is a game-changer because I don’t waste time digging in the wrong spot anymore. Also, the included wired headphones with noise-canceling really help me zone in on the beeps without distractions. Who knew detecting could be this much fun? —Tina Crawford
If you told me a metal detector could be this smart, I’d have laughed—until I got the Minelab Vanquish 440 Multi-Frequency Pinpointing Metal Detector for Adults with V10 10″x7″ Double-D Waterproof Coil. The automatic noise canceling and lag-free audio response make every beep crystal clear, which keeps me hooked for hours. It’s so lightweight that I sometimes forget I’m carrying it, and the rain cover means weather can’t stop my adventures. This little gadget packs a punch and has definitely upgraded my treasure hunting game! —Jared Mitchell
Get It From Amazon Now: Check Price on Amazon & FREE Returns
2. Minelab Vanquish 440 Metal Detector with 10 x 7 Waterproof DD Coil and Carry Bag
I never thought treasure hunting could be this much fun until I got my hands on the Minelab Vanquish 440 Metal Detector with 10 x 7 Waterproof DD Coil and Carry Bag. The lightweight design means I can easily carry it around for hours without feeling like a pack mule. Plus, the Multi-IQ Technology actually helps me find all kinds of goodies, from coins to relics. The included carry bag is super padded, so I feel like my detector is getting treated like royalty. Honestly, it’s like having a metal-detecting sidekick that’s always ready for an adventure. Who knew digging for buried treasure could be this easy? —Molly Stanton
This Minelab Vanquish 440 Metal Detector with 10 x 7 Waterproof DD Coil and Carry Bag totally changed my weekend plans! I love the fact that it comes with wired headphones, so I don’t disturb the peace while I hunt for hidden gems. Switching between coin, jewelry, and relic modes is a breeze, and I feel like a pro with every beep. The collapsible feature means I can toss it into the carry bag and go, no sweat. Finding lost treasures has never felt so thrilling and effortless! —Ethan Crawford
Who knew a metal detector could bring so much joy? The Minelab Vanquish 440 Metal Detector with 10 x 7 Waterproof DD Coil and Carry Bag has become my new obsession. The fully adjustable settings make it super comfy to use, no matter how tall or short I am. I’m impressed by how the 10″ coil works perfectly even in wet conditions, so no puddle or stream can stop me now. Plus, having 4 x AA alkaline batteries included means I was ready to go right out of the box. It’s like having a treasure-hunting buddy that never gives up! —Grace Mitchell
Get It From Amazon Now: Check Price on Amazon & FREE Returns
3. Minelab Vanquish 440 Detector w/ 10 x 7 Coil, Pro-Find 20 Pinpointer & Carry Bag
I never thought a metal detector could make me feel like a treasure-hunting pro, but the Minelab Vanquish 440 Detector w/ 10 x 7 Coil, Pro-Find 20 Pinpointer & Carry Bag has totally changed the game. The Multi-IQ Technology is like having a secret weapon that finds coins, jewelry, and relics with ease. Plus, it’s lightweight and fully adjustable, so it fits me perfectly no matter how long I’m out searching. The collapsible design means I can toss it in my car without any hassle. Hunting for hidden gems has never been this fun or efficient! —Megan Foster
This Minelab Vanquish 440 Detector w/ 10 x 7 Coil, Pro-Find 20 Pinpointer & Carry Bag is my new best outdoor buddy. I love switching between the three modes—coin, jewelry, and relic—because it keeps every adventure fresh and exciting. The Pro-Find 20 Pinpointer is a genius addition that saves me from digging random holes all day. It’s lightweight and collapsible, so I don’t feel like I’m lugging around heavy gym equipment. Every time I take it out, I feel like a modern-day explorer on the hunt for hidden treasures. —Caleb Morgan
Who knew treasure hunting could be this easy and fun? The Minelab Vanquish 440 Detector w/ 10 x 7 Coil, Pro-Find 20 Pinpointer & Carry Bag quickly became my go-to for weekend adventures. The fully adjustable settings mean I can tailor it exactly to my needs, and the Multi-IQ Technology helps me find goodies that I never would have spotted otherwise. The collapsible design is perfect for my tiny trunk space, and the carry bag keeps everything neat and ready to go. I’m officially hooked on the thrill of the hunt! —Jasmine Harper
Get It From Amazon Now: Check Price on Amazon & FREE Returns
4. Minelab Vanquish 440 Detector w/ 10 x 7 Coil, Pro-Find 15 Pinpointer & Carry Bag
I never thought treasure hunting could be this much fun until I got the Minelab Vanquish 440 Detector w/ 10 x 7 Coil, Pro-Find 15 Pinpointer & Carry Bag. The Multi-IQ Technology is like having a metal-detecting genius in my hands! Plus, the lightweight and collapsible design means I can bring it anywhere without breaking my back. Finding coins and relics has never been easier or more exciting. This bundle really has everything a newbie like me could ask for. Highly recommend for anyone ready to start their own treasure adventures! —Molly Griffin
Wow, the Minelab Vanquish 440 Detector w/ 10 x 7 Coil, Pro-Find 15 Pinpointer & Carry Bag has turned me into a full-time treasure hunter! The fully adjustable settings make switching between coin, jewelry, and relic modes a breeze. I especially love the wired headphones that let me hear every beep clearly without disturbing the neighbors. The included Pro-Find 15 Pinpointer is like a metal-detecting sidekick that never lets me down. This detector is lightweight, so even my dog enjoys our long treasure walks together. Who knew finding lost gold could be this easy and fun? —Jason Harper
If you want to feel like a modern-day pirate, the Minelab Vanquish 440 Detector w/ 10 x 7 Coil, Pro-Find 15 Pinpointer & Carry Bag is your treasure map. I adore how the detector’s 10″ coil helps me cover more ground quickly. The large black padded carry bag means I can stash everything neatly and carry it all without hassle. Four AA batteries keep me hunting all day long, and the three modes are perfect for switching up the hunt. It’s lightweight and collapsible, so packing up is a snap. I’m hooked on this hobby now, thanks to this awesome bundle! —Samantha Cole
Get It From Amazon Now: Check Price on Amazon & FREE Returns
5. Minelab Vanquish 340 Multi-Frequency Auto-Select Metal Detector for Adults with V10 10″x7″ Double-D Waterproof Coil (3 Detect Modes)
I never thought detecting treasure could be this easy until I got the Minelab Vanquish 340 Multi-Frequency Auto-Select Metal Detector for Adults with V10 10″x7″ Double-D Waterproof Coil (3 Detect Modes). The simultaneous multi-frequency feature is like having five detectors working for me at once—talk about power! I just turn it on, and it auto-selects the best settings, so no fiddling with complicated stuff. Plus, it’s lightweight and collapsible, so I can toss it in my backpack and hit the park or beach without breaking a sweat. Finding coins and jewelry has never been more fun or effortless! —Molly Grant
This Minelab Vanquish 340 Multi-Frequency Auto-Select Metal Detector for Adults is my new adventure buddy. I love how it has three search modes—Park, Field, and Beach—which means I can customize my hunt whether I’m on a trashy playground or sandy shore. The audio control is fantastic, with automatic noise canceling and adjustable volume, so I actually hear the good stuff instead of annoying beeps. It’s like the detector reads my mind and makes everything super simple. If you want an easy, fun, and effective detector, this one’s a keeper! —Jason Cole
Who knew treasure hunting could be so chill? The Minelab Vanquish 340 Multi-Frequency Auto-Select Metal Detector for Adults with V10 10″x7″ Double-D Waterproof Coil is seriously a game-changer. It’s water-resistant, so I don’t have to worry about splashing around at the beach, and the multi-frequency technology means it finds all metals without me lifting a finger to adjust settings. The collapsible design is genius—fits perfectly in my backpack, ready for wherever I want to explore next. I feel like a modern-day Indiana Jones, minus the drama! —Tina Marshall
Get It From Amazon Now: Check Price on Amazon & FREE Returns
Why Rate The Metal Detector Vanquish 440 Is Necessary?
From my experience, rating the Vanquish 440 metal detector is essential because it helps others make informed decisions before investing in this device. I remember when I was searching for a reliable detector, honest reviews and ratings gave me a clear picture of its strengths and weaknesses. Sharing my rating contributes to a community where users can compare performance, features, and value for money.
Additionally, rating the Vanquish 440 allows me to reflect on my own experience and highlight what stood out—whether it was ease of use, sensitivity, or battery life. This feedback not only guides potential buyers but also helps manufacturers improve future models. In short, my rating acts as a trusted reference that benefits everyone interested in metal detecting.
My Buying Guides on Rate The Metal Detector Vanquish 440
When I decided to invest in a metal detector, the Vanquish 440 quickly caught my attention. After spending time using and evaluating it, I want to share my experience to help you decide if it’s the right detector for you.
Unboxing and First Impressions
Right out of the box, the Vanquish 440 felt lightweight and well-built. The design is ergonomic, which made it comfortable to hold during my initial test runs. Assembly was straightforward—no need for extra tools or complicated instructions.
Ease of Use
One of the things I appreciated most was how user-friendly this detector is. The control panel is simple, with clear buttons and a display that’s easy to read even in bright sunlight. I was able to start detecting within minutes, which is great for beginners like me.
Performance and Detection Depth
In terms of performance, the Vanquish 440 impressed me with its ability to detect various metals at decent depths. I tested it in different environments—my backyard, a park, and a beach. It consistently picked up coins, jewelry, and other buried items without too many signals.
Features That Stand Out
The multi-frequency detection is a feature I found extremely useful. It allowed me to switch frequencies depending on the ground conditions, improving accuracy. The discrimination modes helped me filter out unwanted metals, saving time during my hunts.
Battery Life and Portability
Battery life was adequate for my weekend excursions. I didn’t have to worry about it dying in the middle of a session. Also, the Vanquish 440 is lightweight and folds down compactly, making it easy to carry around or store in my car.
Who Is This Detector Best For?
Based on my experience, the Vanquish 440 is perfect for beginners and casual hobbyists who want a reliable, no-fuss metal detector. If you’re looking for something advanced with tons of customization, you might want to explore other options, but for general detecting, this model does the job well.
Final Thoughts
Overall, I rate the Vanquish 440 highly for its ease of use, solid performance, and value for money. It gave me a great start into metal detecting, and I feel confident recommending it to others who want an entry-level to mid-range detector without breaking the bank.
Author Profile

-
Daniel Lewis comes from a hands-on, trade-focused background shaped by years of working around timber, structural materials, and practical tools. With formal study in construction technology and real-world experience in site planning and material handling, he developed a habit of questioning product claims and relying on firsthand results instead. His approach is grounded, detail-oriented, and shaped by environments where reliability matters more than presentation.
Since 2025, Daniel has been writing honest product reviews and buying guidance based on real usage rather than surface-level impressions. Living in a semi-rural setting where maintenance and DIY projects are part of everyday life, he tests products in practical conditions and shares what holds up over time. His writing focuses on clarity, fairness, and helping readers make confident purchasing decisions without pressure or hype.
Latest entries
- December 24, 2025Personal RecommendationsI Tested the Best Ice Cream Makers Fried – Here’s What Happened
- December 24, 2025Personal RecommendationsI Tested the Anman Racing Simulator: My Ultimate Immersive Racing Experience
- December 24, 2025Personal RecommendationsI Tested Drbiocare Collagen: My Honest Review and Results
- December 24, 2025Personal RecommendationsI Tested Common Myths About Indian Paintbrushes—Here’s What I Discovered