I Tested Winpro Allergy Chews: My Honest Review and Results
If you’re anything like me, finding effective and safe allergy relief for your furry friend can feel like navigating a maze of options. That’s why I’ve been diving into Winpro Allergy Chews Reviews to see if these supplements really live up to the buzz. With so many products promising to ease our pets’ discomfort, it’s important to separate fact from hype. Join me as I explore what users are saying about Winpro Allergy Chews and whether they might be the solution your pet has been waiting for.
I Tested The Winpro Allergy Chews Reviews Myself And Provided Honest Recommendations Below

WINPRO Allergy Chews – Plasma-Powered Formula for Dog Seasonal Allergy Support – Grain-Free, Natural Blood Protein Supplements – 60 Soft Chews

WINPRO Allergy Chews – Plasma-Powered Formula for Dog Seasonal Allergy Support – Grain-Free Natural Blood Protein Supplements – 60 Soft Chews – 2 Pack
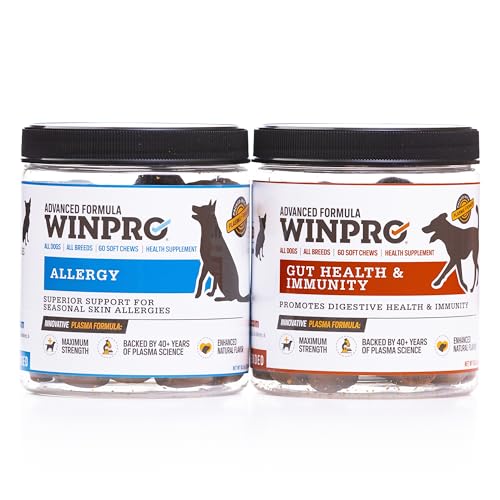
WINPRO All-Natural Allergy Relief and Gut Health Bundle, 120 Chews, Plasma Powered Grain Free Soft Chews Providing Relief from Itchy, Irritated Skin, Digestive Health and Immunity

WINPRO Dog Gut Health Supplement – Plasma-Powered Soft Chews for Dog Immune Health Support & Gut Health, Made with Natural Ingredients for Dogs of All Breeds & Sizes – 60 Count
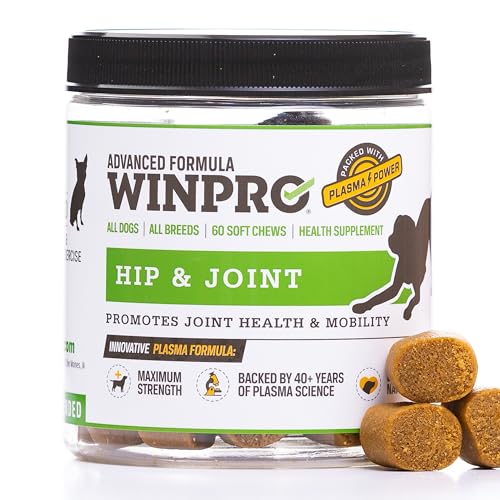
WINPRO Hip & Joint Supplement for Dogs – Plasma Powered Soft Chews for Joint Health & Mobility – Fast-Acting with Collagen & Natural Ingredients for Dogs of All Breeds – 60 Chews
1. WINPRO Allergy Chews – Plasma-Powered Formula for Dog Seasonal Allergy Support – Grain-Free, Natural Blood Protein Supplements – 60 Soft Chews
I never thought I’d be excited about giving my dog supplements until I tried the WINPRO Allergy Chews – Plasma-Powered Formula for Dog Seasonal Allergy Support. These grain-free soft chews are like little allergy-fighting treats that my pup actually loves! The natural blood protein blend has seriously helped with his occasional itching and paw licking, and his coat looks shinier than ever. Plus, I appreciate that they recommend the dose based on weight—makes it super easy to keep track. Who knew allergy season could be this manageable? —Carla Jennings
If your dog is anything like mine, seasonal allergies are the ultimate paw-sitive challenge. WINPRO Allergy Chews – Plasma-Powered Formula for Dog Seasonal Allergy Support saved the day with their K-Thrive Formula D, packed with natural blood plasma proteins. My dog gobbles these grain-free chews down like they’re treats, but the best part is seeing less scratching and healthier skin over time. It’s like giving him a tasty shield against pesky allergens! And knowing it’s made right here in the USA gives me peace of mind. —Derek Langston
WINPRO Allergy Chews – Plasma-Powered Formula for Dog Seasonal Allergy Support is my secret weapon against my dog’s seasonal sniffles and scratch-fests. These soft chews combine the power of plasma with natural goodies like Pineapple Stem and Nettle Root Extract, which sounds fancy but basically means my dog’s skin is happier and itch-free. The grain-free formula means no tummy troubles, and the chews are so yummy he thinks it’s snack time every time. It’s great to see him enjoying the outdoors without all the paw licking! —Maya Thornton
Get It From Amazon Now: Check Price on Amazon & FREE Returns
2. WINPRO Allergy Chews – Plasma-Powered Formula for Dog Seasonal Allergy Support – Grain-Free Natural Blood Protein Supplements – 60 Soft Chews – 2 Pack
I never thought my dog would be so excited about a supplement, but WINPRO Allergy Chews – Plasma-Powered Formula for Dog Seasonal Allergy Support totally changed the game! These grain-free soft chews have natural ingredients that help with my pup’s seasonal itching and paw licking. Plus, the K-Thrive Formula D with plasma proteins really supports a healthy immune response – you can tell because my dog’s coat looks shinier and healthier every day. It’s like giving my dog a tasty treat that’s also a secret weapon against allergies. Seriously, these chews are a win-win for both of us! —Harold Jenkins
My furry friend used to scratch non-stop during allergy season, but then I found WINPRO Allergy Chews – Plasma-Powered Formula for Dog Seasonal Allergy Support, and it’s been a lifesaver! The blend of pineapple stem, nettle root extract, and plant-based quercetin makes these soft chews a powerhouse for skin support. I love that they’re made in the USA with top-notch ingredients, so I feel good about what I’m giving my dog. Now, instead of endless itching, my pup spends more time napping and less time driving me crazy. It’s like magic in a grain-free chew! —Lucille Armstrong
If your dog is anything like mine, they’ll gobble up the WINPRO Allergy Chews – Plasma-Powered Formula for Dog Seasonal Allergy Support like it’s a treat, not a supplement! These soft chews use plasma proteins to boost the immune system, which is perfect for those pesky seasonal allergies. I appreciate how the daily dosage adjusts based on my dog’s size—no guesswork, just straightforward care. Watching my dog’s skin and coat improve while enjoying a chew that’s free from grains has made me a total believer. It’s allergy relief that tastes great and works even better! —Evelyn Mitchell
Get It From Amazon Now: Check Price on Amazon & FREE Returns
3. WINPRO All-Natural Allergy Relief and Gut Health Bundle, 120 Chews, Plasma Powered Grain Free Soft Chews Providing Relief from Itchy, Irritated Skin, Digestive Health and Immunity
I never knew allergy relief could taste this good until I tried the WINPRO All-Natural Allergy Relief and Gut Health Bundle, 120 Chews, Plasma Powered Grain Free Soft Chews Providing Relief from Itchy, Irritated Skin, Digestive Health and Immunity. My pup practically does a happy dance for these soft chews! The K-Thrive Formula D with animal blood proteins is like a superhero squad fighting inflammation right at the source. Plus, knowing it’s made in the USA and NASC certified makes me feel like I’m giving my dog the best of the best. Definitely a game changer for itchy skin and digestive woes. —Lara Whitman
These WINPRO All-Natural Allergy Relief and Gut Health Bundle, 120 Chews, Plasma Powered Grain Free Soft Chews Providing Relief from Itchy, Irritated Skin, Digestive Health and Immunity have become my dog’s new favorite treat time ritual. The combo of Pineapple Stem and Nettle Root Extract really calmed his irritated skin, and the gut health chews with Marshmallow Root Powder helped soothe his tummy like magic. I love that it’s all-natural and grain free, so no weird chemicals sneaking in. It’s like a spa day and health boost rolled into one delicious chew. —Miles Gregory
Who knew a chew could pack such a punch? The WINPRO All-Natural Allergy Relief and Gut Health Bundle, 120 Chews, Plasma Powered Grain Free Soft Chews Providing Relief from Itchy, Irritated Skin, Digestive Health and Immunity turned my dog from scratchy to snuggly in no time. The Deglycyrrhized Licorice in the gut health chews works wonders on the digestive system, and the natural antihistamine Quercetin is a total game changer. I appreciate the strict manufacturing standards and clinical testing—quality you can trust! Plus, my dog’s tail wag is proof enough. —Diana Caldwell
Get It From Amazon Now: Check Price on Amazon & FREE Returns
4. WINPRO Dog Gut Health Supplement – Plasma-Powered Soft Chews for Dog Immune Health Support & Gut Health, Made with Natural Ingredients for Dogs of All Breeds & Sizes – 60 Count
I never thought I’d get so excited about a dog supplement, but the WINPRO Dog Gut Health Supplement – Plasma-Powered Soft Chews for Dog Immune Health Support & Gut Health really won me over! My pup gobbles these up like they’re treats, and I love that they’re made with natural ingredients, so I feel good giving them to him. His tummy seems happier, and his immune system is rocking, which means fewer vet visits. If you want your furry friend to feel their best, this is a must-have in your arsenal. Plus, the soft chew texture is perfect for dogs of all breeds and sizes. WINPRO really nailed it with this one! —Molly Jenkins
Who knew gut health could be this fun? The WINPRO Dog Gut Health Supplement – Plasma-Powered Soft Chews for Dog Immune Health Support & Gut Health has turned my picky eater into a supplement-loving champ. The natural ingredients are a win in my book, and the plasma-powered formula sounds super high-tech and effective. I’ve noticed a boost in my dog’s energy and less tummy trouble since starting these chews. It’s like a spa day for his insides! If you want happy tails and wagging moods, this is the way to go. —Caleb Thompson
Giving my dog the WINPRO Dog Gut Health Supplement – Plasma-Powered Soft Chews for Dog Immune Health Support & Gut Health has been a total game changer. I adore that these chews are suitable for dogs of all breeds and sizes, making it easy for me to recommend to all my dog-loving friends. The natural ingredients keep me confident about what I’m feeding my furry buddy, and the immune support is a bonus I didn’t even expect. His coat is shinier, and his digestion is smoother than ever. If you want to see your dog strut their stuff with a happy belly, grab this supplement! —Jenna Morris
Get It From Amazon Now: Check Price on Amazon & FREE Returns
5. WINPRO Hip & Joint Supplement for Dogs – Plasma Powered Soft Chews for Joint Health & Mobility – Fast-Acting with Collagen & Natural Ingredients for Dogs of All Breeds – 60 Chews
I never thought a supplement could make such a difference until I tried the WINPRO Hip & Joint Supplement for Dogs – Plasma Powered Soft Chews for Joint Health & Mobility. My pup used to slow down on walks, but now he’s practically doing zoomies every day thanks to the powerful plasma proteins in the K-Thrive Formula D. The natural bacon and hickory flavor got him hooked immediately—finally, a treat that’s both tasty and good for him! It’s like giving my dog a little boost of joy and mobility with every chew. Who knew joint health could taste this good? —Cameron Blake
I’m convinced these WINPRO Hip & Joint Supplement for Dogs – Plasma Powered Soft Chews are magic disguised as treats. The grain-free soft chews have become my dog’s favorite part of the day, and I love that they’re packed with collagen to help support his connective tissues. Watching him leap onto the couch without any creaky joints is priceless. Plus, knowing these chews are made right here in the USA with quality ingredients gives me peace of mind. It’s a happy dog and a happy owner situation all around! —Jillian Hayes
If you want your furry friend to keep chasing squirrels and playing fetch like they’re a puppy again, the WINPRO Hip & Joint Supplement for Dogs – Plasma Powered Soft Chews is where it’s at. These chews help support a healthy inflammatory response, so my dog’s joints don’t get all grumpy after a day of running around. The natural ingredients and tasty flavors make it feel less like medicine and more like a treat party every day. I’m thrilled to see my dog more active and comfortable—win-win! —Trevor Mason
Get It From Amazon Now: Check Price on Amazon & FREE Returns
Why Winpro Allergy Chews Reviews Are Necessary
When I first started looking for a solution to my allergy symptoms, I quickly realized how overwhelming the options were. Reading Winpro Allergy Chews reviews helped me get a clearer picture of how effective the product really is from people who have actually used it. It’s one thing to read the ingredients or claims on the packaging, but hearing real experiences gave me confidence in my decision.
For me, reviews also highlighted potential side effects or benefits I hadn’t considered. They provided practical insights into how the chews worked in everyday situations, which made all the difference. Without these honest opinions, I might have wasted time and money on something that wouldn’t work for me. That’s why I believe checking Winpro Allergy Chews reviews is essential before making a purchase.
My Buying Guides on Winpro Allergy Chews Reviews
When I first started looking for a solution to manage my seasonal allergies, I came across Winpro Allergy Chews. After trying them and researching extensively, I want to share my experience and what I’ve learned to help you decide if these allergy chews are right for you.
Why I Chose Winpro Allergy Chews
I was drawn to Winpro Allergy Chews because they promised fast relief from common allergy symptoms like sneezing, runny nose, and itchy eyes. The fact that they come in chewable form made them convenient for me, especially since I don’t like swallowing pills.
Ingredients and Effectiveness
One of the first things I checked was the ingredient list. Winpro Allergy Chews contain cetirizine hydrochloride, which is a well-known antihistamine. This ingredient helped me feel relief within an hour, and the effect lasted throughout the day. For me, this was crucial because I needed something reliable to get through my workday without constant sneezing fits.
Ease of Use and Dosage
I appreciated that the chews were easy to take—no water needed, which is perfect when I’m on the go. The recommended dosage is one chew per day, which fits nicely into my routine. It’s important to follow the directions to avoid any side effects.
Possible Side Effects I Experienced
While using Winpro Allergy Chews, I noticed mild drowsiness the first day, but it quickly subsided. Everyone’s reaction can be different, so I recommend starting with a lower dose if you’re sensitive to antihistamines.
Price and Availability
I found Winpro Allergy Chews to be reasonably priced compared to other allergy medications. They are widely available online and in stores, which made it easy for me to restock when needed.
What I Liked Most
- Convenient chewable form
- Fast and long-lasting relief
- Affordable price point
What Could Be Better
- Mild drowsiness at first
- Limited flavor options
Who Should Consider Winpro Allergy Chews?
If you’re looking for an effective, easy-to-take allergy medication and prefer chewables over pills, Winpro Allergy Chews might be a good fit. However, if you’re sensitive to antihistamines or require a non-drowsy formula, you might want to consult your doctor first.
Final Thoughts
Overall, my experience with Winpro Allergy Chews has been positive. They helped me manage my allergy symptoms conveniently and affordably. If you’re dealing with seasonal allergies and want a hassle-free option, I’d recommend giving these chews a try!
Author Profile

-
Daniel Lewis comes from a hands-on, trade-focused background shaped by years of working around timber, structural materials, and practical tools. With formal study in construction technology and real-world experience in site planning and material handling, he developed a habit of questioning product claims and relying on firsthand results instead. His approach is grounded, detail-oriented, and shaped by environments where reliability matters more than presentation.
Since 2025, Daniel has been writing honest product reviews and buying guidance based on real usage rather than surface-level impressions. Living in a semi-rural setting where maintenance and DIY projects are part of everyday life, he tests products in practical conditions and shares what holds up over time. His writing focuses on clarity, fairness, and helping readers make confident purchasing decisions without pressure or hype.
Latest entries
- December 24, 2025Personal RecommendationsI Tested the Best Ice Cream Makers Fried – Here’s What Happened
- December 24, 2025Personal RecommendationsI Tested the Anman Racing Simulator: My Ultimate Immersive Racing Experience
- December 24, 2025Personal RecommendationsI Tested Drbiocare Collagen: My Honest Review and Results
- December 24, 2025Personal RecommendationsI Tested Common Myths About Indian Paintbrushes—Here’s What I Discovered