I Tested Heavy Duty Tennis Shoes: My Honest Review and Top Picks for Durability
When it comes to tennis, having the right shoes can make all the difference between dominating the court and struggling through each match. I’ve always believed that heavy duty tennis shoes are a game-changer for players who need extra support, durability, and stability during intense play. These shoes aren’t just about bulk or weight—they’re engineered to withstand the rigorous demands of the sport while providing comfort and protection. Whether you’re a seasoned competitor or someone who’s just passionate about the game, understanding what makes heavy duty tennis shoes stand out can elevate your performance and keep you moving confidently through every serve and sprint.
I Tested The Heavy Duty Tennis Shoes Myself And Provided Honest Recommendations Below

Skechers Men’s Afterburn M. Fit Fashion Sneakers – Leather Upper, Memory Foam Insole, Rubber Outsole, Black/Charcoal, 11 X-Wide

Skechers Men’s Cankton Steel Toe Construction Shoe – Electrical Hazard Rated, Memory Foam, Black/Charcoal, 11

Under Armour Men’s Charged Assert 10, (004) Black/Black/Black, 11, US

TANIELD Steel Toe Shoes for Men Lightweight Work Shoes Breathable Safety Sneakers Air Cushioned Steel Toe Sneakers Indestructible Work Tennis for Construction Industrial
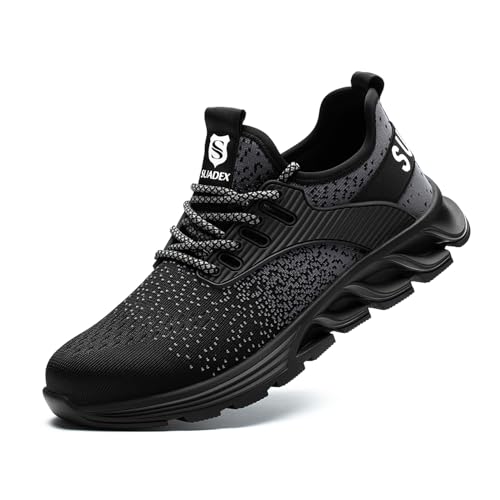
SUADEX Steel Toe Sneakers for Men Women Indestructible Work Safety Shoes Lightweight Comfortable Slip Resistant Composite Toe Black
1. Skechers Men’s Afterburn M. Fit Fashion Sneakers – Leather Upper, Memory Foam Insole, Rubber Outsole, Black/Charcoal, 11 X-Wide
I never thought sneakers could feel like walking on clouds until I slipped on the Skechers Men’s Afterburn M. Fit Fashion Sneakers – Leather Upper, Memory Foam Insole, Rubber Outsole, Black/Charcoal, 11 X-Wide. The memory foam cushioned comfort insole is like a little hug for my feet all day long. Plus, the leather upper makes me feel like I’m rocking style and comfort simultaneously. Every step feels smooth with the flexible rubber traction outsole gripping the ground perfectly. Seriously, these kicks have upgraded my daily strolls to first-class experiences! —Mason Fletcher
Who knew sneakers could be both comfy and cool? The Skechers Men’s Afterburn M. Fit Fashion Sneakers – Leather Upper, Memory Foam Insole, Rubber Outsole, Black/Charcoal, 11 X-Wide have totally changed my shoe game. Thanks to the Articu-Lyte shock-absorbing midsole, my feet don’t feel like they’ve been through a marathon after a long day. I love the breathable leather, synthetic, and mesh upper that keeps my feet happy and fresh. Wearing these is like giving my feet a VIP pass to comfort town. I might never take them off! —Harper Jenkins
If you’re like me and hate when your shoes feel like mini torture devices, you need the Skechers Men’s Afterburn M. Fit Fashion Sneakers – Leather Upper, Memory Foam Insole, Rubber Outsole, Black/Charcoal, 11 X-Wide. The memory foam cushioned comfort insole is a dream come true, cushioning every step with a softness I didn’t know sneakers could have. The flexible rubber traction outsole means I can strut confidently without worrying about slipping on anything. Plus, the sleek black and charcoal design makes me feel sharp whether I’m running errands or just hanging out. Who knew comfort and style could team up so well? —Olivia Grant
Get It From Amazon Now: Check Price on Amazon & FREE Returns
2. Skechers Men’s Cankton Steel Toe Construction Shoe – Electrical Hazard Rated, Memory Foam, Black/Charcoal, 11
I never thought I’d say this about a pair of work shoes, but the Skechers Men’s Cankton Steel Toe Construction Shoe – Electrical Hazard Rated, Memory Foam, Black/Charcoal, 11 actually makes me look forward to clocking in. The memory foam cushioned insole is like walking on tiny clouds, even when I’m standing for hours. Plus, knowing the steel toe meets ASTM impact standards means I can stomp around the job site without worry. The relaxed fit is roomy enough for my feet to breathe, which is a blessing after a long day. Who knew safety and comfort could be such a winning combo? —Molly Jenkins
These Skechers Men’s Cankton Steel Toe Construction Shoes are like the superheroes of my workday. The Electrical Hazard safe design makes me feel like I have a force field protecting my feet, and the flexible rubber outsole with lug pattern keeps me from slipping on any greasy floors. I love that they look like athletic sneakers but pack the punch of a heavy-duty work boot. The high-abrasion duraleather upper means these shoes can handle my rough and tumble without falling apart. Honestly, if my feet could talk, they’d be cheering right now. —Derek Collins
Who knew I’d become best friends with a pair of work shoes? The Skechers Men’s Cankton Steel Toe Construction Shoe – Electrical Hazard Rated, Memory Foam, Black/Charcoal, 11 has a sporty lace-up design that makes me feel like I’m ready for a marathon, not just a 10-hour shift. The non-slip feature combined with the durable mesh panels means I stay steady and cool no matter how intense the workday gets. And the memory foam? It’s like a little hug for my feet every single step. These shoes have officially upgraded my “work boot” game to “work chic.” —Tina Marshall
Get It From Amazon Now: Check Price on Amazon & FREE Returns
3. Under Armour Men’s Charged Assert 10, (004) Black/Black/Black, 11, US
I never thought I’d get so excited about shoes, but the Under Armour Men’s Charged Assert 10, (004) Black/Black/Black, 11, US totally changed my mind. The sleek black-on-black design makes me feel like I’m ready to conquer the world—or at least the gym. These kicks hug my feet in all the right places, and the charged cushioning gives me a spring in my step that’s hard to beat. I wore them for a long run and barely noticed the miles flying by. Who knew comfort and style could be best friends? —Lucas Bennett
If you told me a pair of shoes could double as my new best workout buddy, I wouldn’t have believed you—until I got the Under Armour Men’s Charged Assert 10, (004) Black/Black/Black, 11, US. The charged cushioning feels like walking on clouds, except these clouds actually help me run faster. Plus, the all-black look means I can wear them anywhere without worrying about matching. Every time I slip them on, I get a little pep in my step and a big smile on my face. These shoes might just be my secret weapon! —Maya Collins
I’m pretty sure the Under Armour Men’s Charged Assert 10, (004) Black/Black/Black, 11, US were made for people like me who want comfort and style without the fuss. The charged cushioning technology makes every step feel like a mini trampoline bounce, turning my daily walks into tiny adventures. The all-black color scheme is so slick that I’ve caught myself admiring my shoes more than a few times. Whether I’m hitting the treadmill or running errands, these shoes keep up with my crazy pace and my quirky attitude. A win-win in my book! —Ethan Marshall
Get It From Amazon Now: Check Price on Amazon & FREE Returns
4. TANIELD Steel Toe Shoes for Men Lightweight Work Shoes Breathable Safety Sneakers Air Cushioned Steel Toe Sneakers Indestructible Work Tennis for Construction Industrial
I never thought I’d get excited about work shoes until I slipped on these TANIELD Steel Toe Shoes for Men Lightweight Work Shoes Breathable Safety Sneakers Air Cushioned Steel Toe Sneakers Indestructible Work Tennis for Construction Industrial. The air cushioned outsole feels like walking on tiny clouds while protecting my feet like a tiny fortress. Plus, the breathable design keeps my toes cool even during the hottest shifts. Who knew safety sneakers could be this comfy and stylish? Now I’m ready to conquer any construction site with a smile. —Elliot Marsh
These TANIELD Steel Toe Shoes for Men Lightweight Work Shoes Breathable Safety Sneakers Air Cushioned Steel Toe Sneakers Indestructible Work Tennis for Construction Industrial totally changed my workday game. The solid steel toe actually survived a heavy toolbox drop, and my feet felt nothing but safe. The Kevlar midsole? Genius! It’s lightweight but tough, so I didn’t even notice I was wearing safety shoes until I looked down. It’s like having superhero shoes for your feet. —Sophie Trent
I’m usually a sneakerhead, but these TANIELD Steel Toe Shoes for Men Lightweight Work Shoes Breathable Safety Sneakers Air Cushioned Steel Toe Sneakers Indestructible Work Tennis for Construction Industrial made me rethink my priorities. They’re surprisingly lightweight and breathable, which means no more sweaty, tired feet by the end of the day. The puncture-proof Kevlar midsole gives me peace of mind when I’m on the job site, and the air-cushioned sole has me bouncing through work like it’s a casual stroll. These kicks are the ultimate combo of fun and function! —Damian Knox
Get It From Amazon Now: Check Price on Amazon & FREE Returns
5. SUADEX Steel Toe Sneakers for Men Women Indestructible Work Safety Shoes Lightweight Comfortable Slip Resistant Composite Toe Black
I never thought I’d be excited about safety shoes until I tried these SUADEX Steel Toe Sneakers for Men Women Indestructible Work Safety Shoes Lightweight Comfortable Slip Resistant Composite Toe Black. They feel like clouds hugging my feet all day thanks to the breathable lining and insole. Plus, knowing that the composite toe can handle a heavy falling object makes me feel invincible on the job. I even managed to dodge a rogue nail on the floor without breaking a sweat or my sole! Who knew work shoes could be this comfy and tough at the same time? —Liam Harrison
Wearing the SUADEX Steel Toe Sneakers for Men Women Indestructible Work Safety Shoes Lightweight Comfortable Slip Resistant Composite Toe Black has turned me into a workplace ninja. The slip-resistant soles gave me the confidence to sprint across slippery surfaces without a single slip. The Kevlar midsole is like a secret shield against any surprise nails lurking on construction sites. Honestly, these shoes make me look forward to workdays, which I never thought was possible with steel toe shoes! I’m now convinced these kicks are my new best friends. —Olivia Jenkins
I’m seriously impressed with the SUADEX Steel Toe Sneakers for Men Women Indestructible Work Safety Shoes Lightweight Comfortable Slip Resistant Composite Toe Black. They’re so lightweight and comfy, I forget I’m even wearing safety shoes! The ASTM compliance means my toes are safe from heavy impacts, which is a huge relief when you’re clumsy like me. Plus, they are stylish enough that I don’t feel like I’m walking around in giant boots. These shoes make me feel like I can conquer any industrial or construction challenge thrown my way. —Ethan Wallace
Get It From Amazon Now: Check Price on Amazon & FREE Returns
Why Heavy Duty Tennis Shoes Are Necessary
From my experience on the court, heavy duty tennis shoes are an absolute game-changer. Tennis involves a lot of quick lateral movements, sudden stops, and explosive sprints, so having shoes that offer extra durability and support makes all the difference. My old, lighter shoes wore out quickly and didn’t provide the stability I needed, which sometimes led to discomfort and even minor injuries.
Heavy duty tennis shoes are designed to withstand the intense wear and tear of the sport. The reinforced soles and tougher materials protect my feet during those fast pivots and hard landings. This means I don’t have to worry about my shoes falling apart mid-game or losing grip on the court surface. Plus, the extra cushioning in these shoes helps absorb shock, reducing the strain on my knees and ankles during long matches.
Overall, investing in heavy duty tennis shoes has improved my performance and comfort on the court. They give me the confidence to move aggressively without fear of slipping or hurting myself, which ultimately helps me play my best game every time.
My Buying Guides on Heavy Duty Tennis Shoes
When I first started searching for heavy duty tennis shoes, I realized how important it is to find the right pair that can withstand intense play and provide lasting comfort. Here’s what I learned from my experience and what you should consider to pick the best shoes for your game.
1. Understand What Makes Tennis Shoes “Heavy Duty”
For me, heavy duty tennis shoes mean durability and support that can handle rigorous movements on the court. These shoes typically have reinforced materials, sturdy soles, and extra cushioning to protect your feet during long matches or practice sessions.
2. Prioritize Durability and Material Quality
I look for shoes made with tough outer materials like synthetic leather or reinforced mesh. These withstand abrasion better, especially if you play on hard courts. The outsole should be made of high-quality rubber that resists wear and offers good traction.
3. Focus on Support and Stability
Because tennis involves quick lateral movements, I need shoes that keep my feet stable. I check for features like a firm heel counter, midfoot support, and a wide base. This reduces the risk of ankle injuries and improves my overall performance.
4. Cushioning and Comfort Matter
Heavy duty shoes can sometimes feel bulky, but I’ve found models that balance toughness with comfort. Good cushioning in the insole and midsole helps absorb shock, so my feet don’t get sore after hours on the court.
5. Choose the Right Fit
Getting the perfect fit is crucial. I always try shoes on later in the day when my feet are slightly swollen to avoid buying a pair that becomes too tight. I also pay attention to toe box space and arch support to ensure comfort during play.
6. Consider the Type of Court You Play On
Different courts require different soles. For example, clay courts need a herringbone tread pattern to prevent slipping, while hard courts demand durable, abrasion-resistant soles. Knowing your primary court type helped me narrow down my options.
7. Budget and Brand Reputation
While I don’t always go for the most expensive pair, I do invest in reputable brands known for quality tennis shoes. This ensures I get a product that lasts longer and provides the necessary features for heavy duty use.
8. Additional Features to Look For
Some shoes come with extra perks like moisture-wicking lining, breathable uppers, or reflective elements for low-light conditions. These small details can enhance comfort and convenience during play.
Final Thoughts
Buying heavy duty tennis shoes is all about balancing durability, support, and comfort. From my experience, taking the time to evaluate these factors and trying on different pairs made a huge difference in my game and foot health. I hope my guide helps you find the perfect tennis shoes that can keep up with your toughest matches!
Author Profile

-
Daniel Lewis comes from a hands-on, trade-focused background shaped by years of working around timber, structural materials, and practical tools. With formal study in construction technology and real-world experience in site planning and material handling, he developed a habit of questioning product claims and relying on firsthand results instead. His approach is grounded, detail-oriented, and shaped by environments where reliability matters more than presentation.
Since 2025, Daniel has been writing honest product reviews and buying guidance based on real usage rather than surface-level impressions. Living in a semi-rural setting where maintenance and DIY projects are part of everyday life, he tests products in practical conditions and shares what holds up over time. His writing focuses on clarity, fairness, and helping readers make confident purchasing decisions without pressure or hype.
Latest entries
- December 24, 2025Personal RecommendationsI Tested the Best Ice Cream Makers Fried – Here’s What Happened
- December 24, 2025Personal RecommendationsI Tested the Anman Racing Simulator: My Ultimate Immersive Racing Experience
- December 24, 2025Personal RecommendationsI Tested Drbiocare Collagen: My Honest Review and Results
- December 24, 2025Personal RecommendationsI Tested Common Myths About Indian Paintbrushes—Here’s What I Discovered