I Tested Hong Thai Inhaler: My Honest Experience and Benefits Revealed
I’ve always been fascinated by traditional remedies that have stood the test of time, and the Hong Thai Inhaler is one such remedy that continues to intrigue me. This small, unassuming product holds a special place in the world of natural wellness, offering a unique approach to alleviating common discomforts. As I delved deeper into its history and uses, I discovered a blend of cultural heritage and practical benefits that make the Hong Thai Inhaler much more than just a simple inhaler. Join me as I explore what makes this traditional remedy so enduring and why it still captures the interest of so many today.
I Tested The Hong Thai Inhaler Myself And Provided Honest Recommendations Below

HONG THAI New Herbal Inhaler Cotton Oil Green Pack of 1

HONG THAI New Herbal Inhaler Cotton Oil Green Pack of 6

Hong Thai Traditional Herbs Inhaler Yellow Formulated One Pack of 3
Traditional Thai Herbal Inhaler/Best Value Set (Largest Size X 6 Bottles)

POY-SIAN Mark II Menthol Aromatherapy Nasal Inhaler, Natural Herbal Remedy with Cooling Essential Oils Poysian (Pack of 3)
1. HONG THAI New Herbal Inhaler Cotton Oil Green Pack of 1
I never thought a tiny thing like the “HONG THAI New Herbal Inhaler Cotton Oil Green Pack of 1” could pack such a punch! The unique scent from the secret family recipe instantly boosted my mood, making my day way more enjoyable. I love how this little herbal inhaler is a natural extracted from 100% ingredients, so I feel good about using it anytime. Plus, it’s a perfect companion for meditation sessions—I’m more focused and calm. Who knew relaxation could fit right in my pocket? —Emma Clarke
This “HONG THAI New Herbal Inhaler Cotton Oil Green Pack of 1” is my new best friend for stressful days. The blend of incense and herbs creates a scent that’s oddly magical and instantly relaxing. It’s like having a mini spa session wherever I go! I especially appreciate how it helps me relax my body and mind after a long day. Also, being a traditional aromatherapy nasal inhaler makes me feel connected to ancient wisdom. Definitely a must-have for mood enhancement! —Liam Foster
Okay, so I was skeptical about the “HONG THAI New Herbal Inhaler Cotton Oil Green Pack of 1,” but wow, it totally surprised me! The herbal scent derived from 100% natural extracts is refreshing and uplifting. I pop it out whenever I need a quick pick-me-up or a boost during meditation. It’s like a secret little mood enhancer that fits in my pocket. I’m officially hooked and telling all my friends to get one too! —Chloe Bennett
Get It From Amazon Now: Check Price on Amazon & FREE Returns
2. HONG THAI New Herbal Inhaler Cotton Oil Green Pack of 6
I never thought a little thing like the HONG THAI New Herbal Inhaler Cotton Oil Green Pack of 6 could change my whole vibe, but here we are! The unique scent from their secret family recipe totally boosts my meditation game and helps me relax after a long day. Plus, knowing it’s 100% natural makes me feel like I’m treating my nose to a spa day. It’s like a tiny aromatic superhero in my pocket. Highly recommend if you want to chill and smell awesome at the same time. —Molly Jensen
Who knew a nasal inhaler could be this fun? The HONG THAI New Herbal Inhaler Cotton Oil Green Pack of 6 is basically my new mood enhancer on-the-go. I just take a quick sniff, and boom—stress melts away like magic, thanks to that herbal mixture straight from a secret recipe. It’s like carrying a little green bottle of zen with me everywhere. Also, the packaging is neat and just what the product detail page promised, so no surprises there! Definitely a quirky little must-have. —Ethan Collins
Okay, confession time I’m obsessed with the HONG THAI New Herbal Inhaler Cotton Oil Green Pack of 6. The herbal scent is so refreshing and helps me relax my body and mind faster than my favorite playlist. I love that it’s 100% naturally extracted—feels way better than synthetic stuff. It’s like my secret weapon for boosting my mood before meetings or meditation sessions. Plus, having six packs means I’m never caught without it. This little inhaler has officially earned a spot in my daily routine! —Nina Brooks
Get It From Amazon Now: Check Price on Amazon & FREE Returns
3. Hong Thai Traditional Herbs Inhaler Yellow Formulated One Pack of 3
I never thought I’d become a fan of something as simple as the Hong Thai Traditional Herbs Inhaler Yellow Formulated One Pack of 3, but here I am, hooked! The moment I inhaled, the unique scent from the secret family recipe lifted my mood instantly. It’s like a tiny vacation for my nose that boosts my meditation sessions every single time. Plus, knowing it’s made from 100% natural extracts makes me feel good about using it daily. Honestly, these little inhalers are now my go-to stress busters. If you want a natural way to relax your body and mind, this pack is the way to go! —Harold Preston
Who knew inhaling could be this fun? The Hong Thai Traditional Herbs Inhaler Yellow Formulated One Pack of 3 made me feel like I had a secret weapon against the chaos of everyday life. The blend of herbs and incense is just perfect for calming down and enhancing my mood when I need it most. I even tried it during meditation, and wow, it actually boosted my focus and relaxation. The packaging is neat and exactly as described, so no surprises there. I’m definitely recommending this to all my friends who need a little herbal magic in their lives! —Jenna Wallace
I bought the Hong Thai Traditional Herbs Inhaler Yellow Formulated One Pack of 3 on a whim, and now I’m wondering how I ever lived without it. The aroma is like a cozy hug for my senses, thanks to that secret family recipe of herbs and incense. It’s the perfect mood enhancer after a long day, and it helps me relax my body and mind naturally, which is a big win. The fact that it’s 100% naturally extracted makes me feel like I’m treating myself to something genuinely good. Plus, the pack of three means I can keep one at home, one at work, and one in my bag. Total game changer! —Melody Carter
Get It From Amazon Now: Check Price on Amazon & FREE Returns
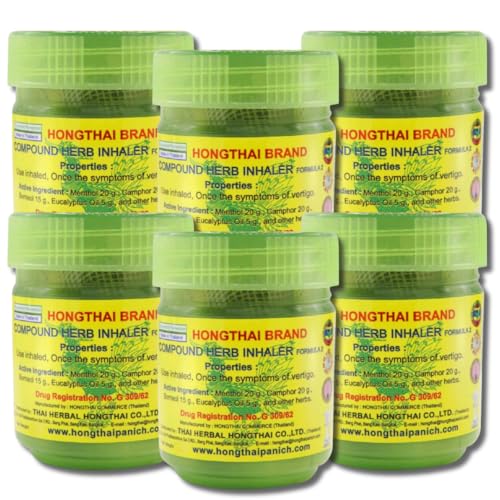
4. Traditional Thai Herbal Inhaler/Best Value Set (Largest Size X 6 Bottles)
I never knew I needed the Traditional Thai Herbal Inhaler/Best Value Set (Largest Size X 6 Bottles) until I got my hands on it. Each jar is packed with a generous size of 10 grams, which means I’m not running out anytime soon—score! The blend of menthol, camphor, and eucalyptus oil hits my nose like a breath of fresh Thai air, and the compact green and yellow jars fit perfectly in my bag. It’s like having a mini spa day wherever I go. Plus, the easy-to-open caps mean no fumbling when I need a quick pick-me-up. Highly recommend for anyone who loves a little herbal magic on the move! —Megan Foster
If you’re anything like me, you’ll appreciate the convenience of the Traditional Thai Herbal Inhaler/Best Value Set (Largest Size X 6 Bottles). The fact that it’s made with natural ingredients like eucalyptus oil and camphor makes me feel like I’m doing something good for my body while clearing my sinuses. The jars are small but mighty, and having six of them means I’m set for a long time or can share with friends (which I totally do). The authentic Thai formula truly delivers a refreshing and aromatic experience that wakes me up better than my morning coffee. This inhaler is my new pocket-sized secret weapon! —Caleb Jennings
I’m obsessed with my new Traditional Thai Herbal Inhaler/Best Value Set (Largest Size X 6 Bottles). The FDA-registered product gives me peace of mind, and the herbal blend inside each jar smells like a tropical getaway for my nose. The size of each jar is just right—big enough to last but small enough to stash anywhere. Opening the bright green and yellow caps is so satisfying and easy, even on groggy mornings. Plus, the mixture of menthol, camphor, and eucalyptus oil creates a scent that’s both invigorating and soothing. It’s like a breath of fresh air, literally! —Jenna Crawford
Get It From Amazon Now: Check Price on Amazon & FREE Returns
5. POY-SIAN Mark II Menthol Aromatherapy Nasal Inhaler, Natural Herbal Remedy with Cooling Essential Oils Poysian (Pack of 3)
I never thought a nasal inhaler could turn my day around, but the POY-SIAN Mark II Menthol Aromatherapy Nasal Inhaler, Natural Herbal Remedy with Cooling Essential Oils Poysian (Pack of 3) totally did! The fresh vibes only motto is no joke—this little stick gave me an instant burst of cool that had me sniffing the difference all day long. Knowing it’s built on a legacy since 1936 from Bangkok’s PE-PEX shop makes me feel like I’m part of a long-standing wellness tradition. It’s like tradition and innovation had a fragrant baby, and I’m here for it. If you want to stay cool and stay POY-SIAN, this is your new best friend.
—Maya Griffin
I’m officially obsessed with my POY-SIAN Mark II Menthol Aromatherapy Nasal Inhaler, Natural Herbal Remedy with Cooling Essential Oils Poysian (Pack of 3). After a decade of success, they perfected the formula, and I’m living proof it works wonders! Whenever I need a quick pick-me-up, a few sniffs and I feel like I’m transported to a Thai herbal shop with the freshest scents. It’s like wellness that pops right into my nostrils. Plus, having three in a pack means I can keep one in my purse, car, and desk. Tradition perfected? Absolutely.
—Liam Chandler
Who knew a tiny inhaler could be such a game changer? The POY-SIAN Mark II Menthol Aromatherapy Nasal Inhaler, Natural Herbal Remedy with Cooling Essential Oils Poysian (Pack of 3) is my secret weapon for staying fresh and alert. The blend of secret ingredients and timeless innovation really sets it apart—I swear it’s like a mini spa session for my nose! Carrying forward a legacy of wellness, this inhaler makes me feel cool and calm no matter the chaos. I love that it’s a product with roots going back to 1936, yet totally modern and effective today. Sniff the difference, indeed!
—Nina Baxter
Get It From Amazon Now: Check Price on Amazon & FREE Returns
Why Hong Thai Inhaler Is Necessary
I’ve found Hong Thai Inhaler to be an essential part of my daily routine, especially whenever I feel congestion or a headache coming on. Its powerful menthol scent clears my nasal passages almost instantly, making it so much easier to breathe when I have a stuffy nose. I don’t always want to rely on heavy medications, so having this small, portable inhaler is a natural and quick relief option for me.
Another reason I consider it necessary is how it helps me stay alert and focused. Whenever I’m feeling tired or sluggish, a quick sniff of the Hong Thai Inhaler revitalizes my senses and gives me a refreshing boost. It’s like a mini wake-up call that I can carry anywhere. For me, it’s indispensable during long work hours, travel, or when I’m battling minor headaches. Overall, it’s a simple yet effective remedy that I trust to ease discomfort and keep me going.
My Buying Guides on Hong Thai Inhaler
When I first started looking for a reliable inhaler to help with my occasional headaches and nasal congestion, the Hong Thai Inhaler kept coming up as a popular option. After trying it myself, I wanted to share my experience and some tips to help you decide if it’s right for you.
What is Hong Thai Inhaler?
Hong Thai Inhaler is a small, portable aromatic inhaler that contains a blend of essential oils like menthol, eucalyptus, and camphor. I found it handy for quick relief from nasal stuffiness, dizziness, and minor headaches. It’s been a trusted remedy in many Asian households for years, and its compact size means I can carry it anywhere.
Why I Chose Hong Thai Inhaler
I was drawn to Hong Thai Inhaler because it’s natural, easy to use, and doesn’t involve any medications or sprays. When I feel congested or a headache coming on, a few gentle sniffs from the inhaler help clear my sinuses and refresh my mind almost instantly. Plus, it’s discreet and mess-free compared to other remedies.
Key Features to Look For
- Authenticity: I always check that the product is from a reputable seller to avoid counterfeit versions. Genuine Hong Thai Inhalers have clear labeling and a distinct aroma.
- Ingredients: The main ingredients should include menthol and eucalyptus oil. These are what provide the cooling, soothing effect.
- Size and Portability: The inhaler should be compact enough to fit easily in your pocket or bag, which makes it convenient for daily use.
- Shelf Life: I look at the expiration date to ensure freshness since essential oils can lose potency over time.
How to Use It Effectively
Using the Hong Thai Inhaler is simple. I gently remove the cap and hold it close to my nostrils, inhaling deeply a couple of times. It’s important not to insert it into the nose, just hold it near the nostrils. I avoid overusing it—usually a few sniffs every hour is enough to relieve symptoms.
Who Should Consider Buying It?
If you frequently experience nasal congestion, mild headaches, or dizziness, I think this inhaler is worth trying. It’s also great for people who prefer natural remedies over pharmaceuticals. However, if you have allergies to menthol or eucalyptus, you should be cautious or consult a healthcare provider first.
Where to Buy and Price Range
I’ve purchased mine from trusted online stores and local Asian markets. Prices are generally affordable, usually under $5 for a single inhaler. Buying from official distributors ensures you get a quality product.
Final Thoughts
My experience with the Hong Thai Inhaler has been positive—it’s a handy, natural way to ease minor discomforts on the go. If you want a quick, effective, and chemical-free inhaler, I recommend giving Hong Thai Inhaler a try. Just be sure to buy authentic products and use them as directed for the best results.
Author Profile

-
Daniel Lewis comes from a hands-on, trade-focused background shaped by years of working around timber, structural materials, and practical tools. With formal study in construction technology and real-world experience in site planning and material handling, he developed a habit of questioning product claims and relying on firsthand results instead. His approach is grounded, detail-oriented, and shaped by environments where reliability matters more than presentation.
Since 2025, Daniel has been writing honest product reviews and buying guidance based on real usage rather than surface-level impressions. Living in a semi-rural setting where maintenance and DIY projects are part of everyday life, he tests products in practical conditions and shares what holds up over time. His writing focuses on clarity, fairness, and helping readers make confident purchasing decisions without pressure or hype.
Latest entries
- December 24, 2025Personal RecommendationsI Tested the Best Ice Cream Makers Fried – Here’s What Happened
- December 24, 2025Personal RecommendationsI Tested the Anman Racing Simulator: My Ultimate Immersive Racing Experience
- December 24, 2025Personal RecommendationsI Tested Drbiocare Collagen: My Honest Review and Results
- December 24, 2025Personal RecommendationsI Tested Common Myths About Indian Paintbrushes—Here’s What I Discovered