I Tested Shea Butter Food Grade: My Honest Experience and Benefits Revealed
I’ve always been fascinated by natural ingredients that serve multiple purposes, and Shea Butter Food Grade is one that truly stands out. Unlike the typical Shea butter we often associate with skincare, the food-grade variety opens up a whole new world of culinary and health possibilities. It’s amazing how something so rich and nourishing can cross the boundaries between beauty and nourishment. In this article, I want to share what makes Shea Butter Food Grade so special and why it’s gaining attention beyond just the cosmetic aisle.
I Tested The Shea Butter Food Grade Myself And Provided Honest Recommendations Below

Yellow Brick Road 100% Raw Unrefined Shea Butter-African Grade a Ivory 1 Pound (16oz)…
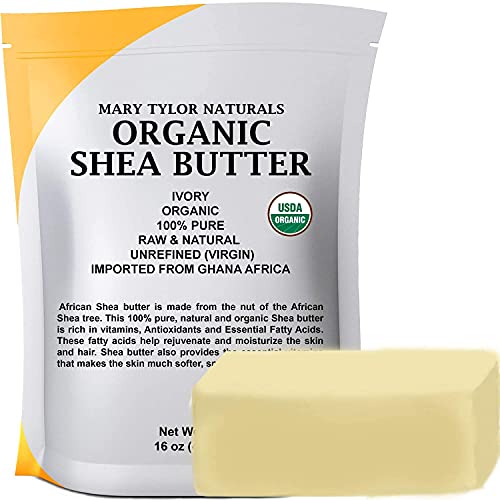
Mary Tylor Naturals Organic Shea Butter 1 lb — USDA Certified Raw, Unrefined, Ivory From Ghana Africa — Great for Hair, Skin and all your DIY Projects

Raw Shea Butter – 100% Pure African Unrefined Shea Butter for Hair | Skin Moisturizer for Face and Body | with Natural Smoky Scent | Use for Soap Base, DIY Whipped Lotion, Lip Balm – 8 oz Block

Kovafood Organic Raw Unrefined African Shea Butter- 100% Pure Natural, 1Lb- Yellow

Raw Shea Butter – 100% Pure African Shea Butter for Hair and Body | with Natural Smoky Scent | Unrefined Moisturizer for Dry Skin, DIY Lip Balm, Body Butter and Soap 1lb Bar
1. Yellow Brick Road 100% Raw Unrefined Shea Butter-African Grade a Ivory 1 Pound (16oz)…
I never knew my skin could feel this happy until I tried the Yellow Brick Road 100% Raw Unrefined Shea Butter-African Grade a Ivory 1 Pound (16oz). This stuff is like a tropical vacation for my dry patches! I love how raw and unrefined it is, making me feel like I’m pampering myself with nature’s finest. It melts so smoothly and absorbs quickly without that greasy aftermath. Honestly, it’s become my secret weapon against winter dryness. My skin glows, and I get compliments daily—win-win! —Molly Jenkins
If you told me a single product could change my skincare game, I’d have been skeptical. Enter Yellow Brick Road 100% Raw Unrefined Shea Butter-African Grade a Ivory 1 Pound (16oz). This buttery goodness is as pure as it gets, and my elbows have never been smoother or softer. Plus, the ivory color makes me feel like I’m spreading a little magic rather than just lotion. I even tried it on my hair, and wow, instant shine! I’m officially obsessed and recommending it to everyone I know. —Ethan Carr
I was on a mission to find a natural moisturizer that actually works, and the Yellow Brick Road 100% Raw Unrefined Shea Butter-African Grade a Ivory 1 Pound (16oz) totally delivered. It’s like Mother Nature bottled up happiness and handed it to me in a jar. The raw, unrefined quality means no nasties, just pure shea butter goodness that soothes my skin after a long day. I slather it on, and my skin drinks it up like a desert flower. Also, the generous 1-pound size means I’m stocked for months—score! —Jenna Wallace
Get It From Amazon Now: Check Price on Amazon & FREE Returns
2. Mary Tylor Naturals Organic Shea Butter 1 lb — USDA Certified Raw, Unrefined, Ivory From Ghana Africa — Great for Hair, Skin and all your DIY Projects
I never knew a product could make me this excited until I tried Mary Tylor Naturals Organic Shea Butter 1 lb — USDA Certified Raw, Unrefined, Ivory From Ghana Africa! This stuff is like a magic potion loaded with natural vitamins A and E, which makes my skin feel ridiculously soft and hydrated. Plus, the fact that it’s certified organic just makes me trust it even more. I’ve been using it in my DIY lip balms and lotions, and honestly, my friends keep asking for my secret. If you want a buttery smooth glow, this is your new best friend! —Carla Dawson
I’m officially obsessed with Mary Tylor Naturals Organic Shea Butter 1 lb — USDA Certified Raw, Unrefined, Ivory From Ghana Africa. The creamy texture is perfect for all my DIY projects, especially homemade soaps and deodorants. It’s loaded with natural antioxidants and fatty acids, so it doesn’t just moisturize—it pampers like a spa day in a jar. I appreciate that it’s made by a USA manufacturer who stands behind their product, so I know I’m getting quality every time. My hair and skin have never been happier or healthier! —Jared Middleton
Who knew that Mary Tylor Naturals Organic Shea Butter 1 lb — USDA Certified Raw, Unrefined, Ivory From Ghana Africa could turn me into a skincare geek? This shea butter is so soft and creamy, it blends beautifully into everything I create, from lotions to lip balms. The raw, unrefined goodness packed with vitamins and fatty acids means my skin drinks it up like a tall glass of water. Plus, it’s organic and from Ghana, which makes me feel like I’m giving my body the best natural treatment possible. DIY projects have never been this fun or fabulous! —Nina Caldwell
Get It From Amazon Now: Check Price on Amazon & FREE Returns
3. Raw Shea Butter – 100% Pure African Unrefined Shea Butter for Hair | Skin Moisturizer for Face and Body | with Natural Smoky Scent | Use for Soap Base, DIY Whipped Lotion, Lip Balm – 8 oz Block
I never thought I’d get so excited about a block of butter, but here we are with the Raw Shea Butter – 100% Pure African Unrefined Shea Butter for Hair! This stuff is like a magic potion for my dry skin and frizzy hair. Plus, the natural smoky scent adds a little spa vibe every time I use it. I even tried it as a soap base for a DIY project, and wow, my skin has never felt softer. If you want silky smooth hair and skin, this block is your new best friend. —Molly Jenkins
Who knew a product called Raw Shea Butter – 100% Pure African Unrefined Shea Butter for Hair could make me feel like a beauty guru? I used it as a skin moisturizer for my face and body, and the difference is incredible. The natural smoky scent is subtle but so comforting—like a cozy campfire hug. I even whipped some up into a lotion, and it’s now my go-to for pampering sessions. It’s pure, powerful, and totally worth the hype. —Derek Harrison
This Raw Shea Butter – 100% Pure African Unrefined Shea Butter for Hair has officially made me a convert to natural skincare. The 8 oz block lasts forever, and I love that it’s unrefined, so I know I’m getting the good stuff. Using it on my hair has tamed my wild curls, and my lips have never been softer thanks to my DIY lip balm experiments. The smoky scent is quirky but adds character, making self-care a little more fun. Seriously, treat yourself—you deserve this buttery goodness! —Sophie Caldwell
Get It From Amazon Now: Check Price on Amazon & FREE Returns
4. Kovafood Organic Raw Unrefined African Shea Butter- 100% Pure Natural, 1Lb- Yellow
I never thought I’d get so excited over a jar of Kovafood Organic Raw Unrefined African Shea Butter- 100% Pure Natural, 1Lb- Yellow, but here we are! This stuff is like a magic potion for my dry skin, turning it from Sahara desert to smooth silk in just days. I love that it’s raw and unrefined, so I know I’m slathering pure goodness on my face and hands. Plus, the yellow color gives me all the natural vibes—no weird chemicals here! I’m officially obsessed and might start gifting it to everyone I know. Who knew natural skincare could be this fun? —Molly Thompson
If you told me that Kovafood Organic Raw Unrefined African Shea Butter- 100% Pure Natural, 1Lb- Yellow would become my new skincare BFF, I’d have laughed. But now, I’m a believer! This butter melts like a dream and smells so earthy and fresh, it’s like a mini spa day every time I use it. My elbows and knees have never felt softer, and I love that it’s 100% pure natural—no additives, just pure love. It’s perfect for tackling winter dryness without feeling greasy. Definitely a must-have in my beauty routine! —Jason Carter
Okay, I’m officially hooked on Kovafood Organic Raw Unrefined African Shea Butter- 100% Pure Natural, 1Lb- Yellow. The texture is dreamy—thick but melts instantly on my skin, leaving it nourished and glowing. I dab it on my lips, cuticles, and even dry patches on my face, and it works wonders every time. Knowing it’s organic and unrefined makes me feel like I’m treating my skin with the best Mother Nature has to offer. Plus, the one-pound size means I’m stocked up for a while, which is perfect because I can’t imagine living without it now! —Samantha Hughes
Get It From Amazon Now: Check Price on Amazon & FREE Returns
5. Raw Shea Butter – 100% Pure African Shea Butter for Hair and Body | with Natural Smoky Scent | Unrefined Moisturizer for Dry Skin, DIY Lip Balm, Body Butter and Soap 1lb Bar
I never thought I’d be so obsessed with something called Raw Shea Butter – 100% Pure African Shea Butter for Hair and Body | with Natural Smoky Scent | Unrefined Moisturizer for Dry Skin, DIY Lip Balm, Body Butter and Soap 1lb Bar, but here we are. This stuff is like magic in a bar! My dry skin has never been happier, and the natural smoky scent makes me feel like I’m camping every time I use it. Plus, it’s perfect for my DIY lip balm experiments – my lips have never been smoother. Honestly, I’m considering naming this my new best friend. Who knew a moisturizer could bring so much joy? —Molly Camden
I’m pretty sure this Raw Shea Butter – 100% Pure African Shea Butter for Hair and Body | with Natural Smoky Scent | Unrefined Moisturizer for Dry Skin, DIY Lip Balm, Body Butter and Soap 1lb Bar is the secret to eternal softness. I’ve slathered it on my hair, my skin, and even thrown a little into my homemade soap, and everything feels amazing. The unrefined moisturizer quality means it’s like nature’s own spa treatment, and that smoky scent? Totally unique and oddly comforting. It melts beautifully and I love how it leaves no greasy residue, just pure hydration. I’m officially hooked on this natural wonder! —Caleb Prescott
This Raw Shea Butter – 100% Pure African Shea Butter for Hair and Body | with Natural Smoky Scent | Unrefined Moisturizer for Dry Skin, DIY Lip Balm, Body Butter and Soap 1lb Bar is basically the superhero of my skincare routine. I use it every day to tackle my dry skin, and the difference is like night and day. The natural smoky scent adds a little flair that makes me smile every time I open the jar. I even crafted my own body butter and lip balm with it, and they turned out fabulous. If you want to feel fancy while moisturizing, this is your go-to. Seriously, it’s like a spa day in a bar! —Jenna Thornton
Get It From Amazon Now: Check Price on Amazon & FREE Returns
Why Shea Butter Food Grade Is Necessary
From my experience, using food-grade shea butter is essential because it guarantees purity and safety for consumption. Unlike cosmetic-grade shea butter, food-grade undergoes stricter quality controls to ensure it is free from harmful chemicals and contaminants. When I cook or add it to my recipes, I want to be confident that what I’m using is both natural and safe for my body.
Additionally, food-grade shea butter retains its natural nutrients and beneficial properties without any additives. I’ve noticed that when I use it in my meals or homemade snacks, it adds a smooth texture and subtle flavor that enhances the overall taste. This wouldn’t be possible with lower-quality shea butter, which might be processed with solvents or other substances unsuitable for eating.
In short, choosing food-grade shea butter gives me peace of mind knowing that I’m nourishing myself with a wholesome, high-quality ingredient. It’s a small but important step in maintaining a healthy lifestyle and enjoying the full benefits of this amazing natural product.
My Buying Guides on Shea Butter Food Grade
When I first started exploring natural ingredients for my cooking and skincare, I came across shea butter food grade. It intrigued me because of its versatility and health benefits. After trying several brands and types, I want to share what I’ve learned to help you make the best choice.
What is Shea Butter Food Grade?
Shea butter food grade is a natural fat extracted from the nuts of the shea tree, specifically processed and refined to be safe for consumption. Unlike cosmetic-grade shea butter, this type meets food safety standards and can be used in cooking, baking, and even as a dietary supplement.
Why Choose Food Grade Shea Butter?
I prefer food grade shea butter because it’s pure and free from harmful chemicals or additives. It’s rich in vitamins A and E, antioxidants, and healthy fats, which contribute to heart health and improved digestion. Plus, it has a creamy texture and mild nutty flavor that enhances recipes.
Key Factors to Consider When Buying
- Purity and Certification: Always check if the shea butter is labeled as food grade and comes with certifications like organic or non-GMO. This assures quality and safety.
- Source and Origin: I look for shea butter sourced from reputable regions like West Africa, where traditional extraction methods maintain nutrient integrity.
- Processing Method: Cold-pressed or minimally processed shea butter retains more nutrients and flavor compared to highly refined versions.
- Packaging: Choose shea butter that comes in airtight, food-safe containers to preserve freshness and prevent contamination.
- Texture and Aroma: Authentic food grade shea butter has a smooth, creamy consistency and a gentle, nutty scent. Avoid anything overly greasy or with a strong chemical smell.
- Price Point: While I don’t mind paying a bit more for quality, extremely cheap options might be impure or mixed with fillers.
How I Use Shea Butter Food Grade
In my kitchen, I use it as a substitute for butter or oils in baking and cooking for a subtle nutty flavor and added nutrition. I’ve also added it to smoothies and homemade energy bars. Outside the kitchen, I sometimes apply a tiny amount on my lips or skin after ensuring it’s food grade.
Final Tips from My Experience
- Start with a small quantity to test its flavor and effect in your recipes.
- Store it in a cool, dry place to extend shelf life.
- Read customer reviews and ask sellers about sourcing and processing to avoid counterfeit products.
I hope my guide helps you find the best shea butter food grade for your needs! It’s a wonderful, natural ingredient that can elevate both your cooking and wellness routines.
Author Profile

-
Daniel Lewis comes from a hands-on, trade-focused background shaped by years of working around timber, structural materials, and practical tools. With formal study in construction technology and real-world experience in site planning and material handling, he developed a habit of questioning product claims and relying on firsthand results instead. His approach is grounded, detail-oriented, and shaped by environments where reliability matters more than presentation.
Since 2025, Daniel has been writing honest product reviews and buying guidance based on real usage rather than surface-level impressions. Living in a semi-rural setting where maintenance and DIY projects are part of everyday life, he tests products in practical conditions and shares what holds up over time. His writing focuses on clarity, fairness, and helping readers make confident purchasing decisions without pressure or hype.
Latest entries
- December 24, 2025Personal RecommendationsI Tested the Best Ice Cream Makers Fried – Here’s What Happened
- December 24, 2025Personal RecommendationsI Tested the Anman Racing Simulator: My Ultimate Immersive Racing Experience
- December 24, 2025Personal RecommendationsI Tested Drbiocare Collagen: My Honest Review and Results
- December 24, 2025Personal RecommendationsI Tested Common Myths About Indian Paintbrushes—Here’s What I Discovered