I Tested the Storm Glass Weather Predictor: Does It Really Work?
I’ve always been fascinated by the ways people have tried to understand and predict the weather long before modern technology took over. Among the many intriguing tools that have stood the test of time, the Storm Glass Weather Predictor holds a special place. This mysterious-looking device, with its swirling crystals and delicate liquid, has captured imaginations for centuries. It’s not just a piece of history; it’s a blend of science, art, and a hint of mystery that invites us to look at weather forecasting through a different lens. In this article, I want to share what makes the Storm Glass so captivating and why it continues to intrigue weather enthusiasts and curious minds alike.
I Tested The Storm Glass Weather Predictor Myself And Provided Honest Recommendations Below

Enkrio Storm Glass Weather Predictor, Weather Station Weather Forecaster with Wood Base, Creative Crystal Glass Bottle for Home & Office Decoration (S)

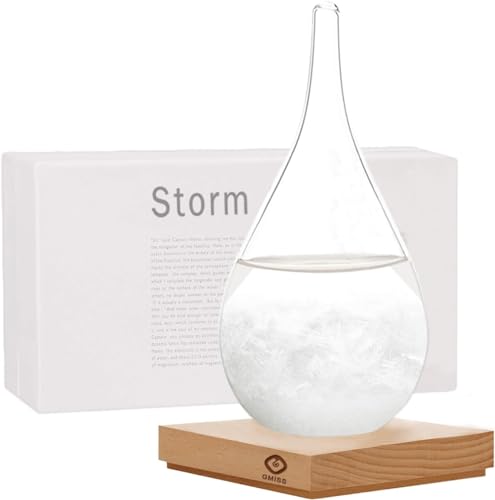
Storm Glass Weather Predictor, Teardrop-Shaped Weather Globe Home/Office Desktop Decoration, Christmas Decor Snow Globe Weather Forecast Station, Unique Christmas Gifts

Enkrio Storm Glass Weather Predictor, Barometer Bottle with Wood Base for Home & Office Decoration – Weather Station (Medium)
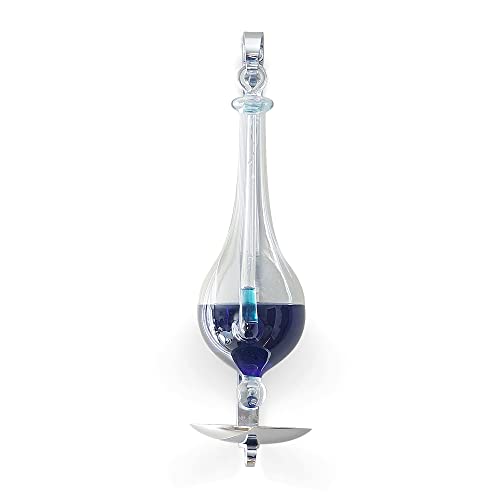
Ambient Weather B1025C Antique Storm Glass Wall Mount Liquid Barometer with Drip Cup
Storm Glass Weather Predictor,Christmas Snow Globe Storm Glass Barometer Weather Predictor, Home and Office Decorative Glass Bottles, Christmas Unique Gifts for Him
1. Enkrio Storm Glass Weather Predictor, Weather Station Weather Forecaster with Wood Base, Creative Crystal Glass Bottle for Home & Office Decoration (S)
I never thought I’d say this, but the Enkrio Storm Glass Weather Predictor, Weather Station Weather Forecaster with Wood Base, Creative Crystal Glass Bottle for Home & Office Decoration (S) has become my new weather guru. Watching those crystal formations change is oddly satisfying, and I feel like a meteorologist in my own living room! Plus, the minimalist drop-shaped design fits perfectly on my desk without looking like a science experiment. It’s like having a tiny weather wizard on standby, and honestly, it makes me feel smarter when I plan my day. Who knew predicting storms could be so stylish and fun? —Jenna Clarke
If you’re anything like me and love quirky home decor, this Enkrio Storm Glass Weather Predictor, Weather Station Weather Forecaster with Wood Base, Creative Crystal Glass Bottle for Home & Office Decoration (S) is a must-have. The wooden base is sturdy and classy, holding the storm glass like a pro, and it adds a touch of elegance to my kitchen counter. I enjoy checking out the crystal changes—it’s like my own little weather show happening right at home. It’s definitely the coolest conversation starter when friends come over! I didn’t expect a weather station to double as such a chic decoration. —Marcus Fields
The Enkrio Storm Glass Weather Predictor, Weather Station Weather Forecaster with Wood Base, Creative Crystal Glass Bottle for Home & Office Decoration (S) is my new favorite desktop companion. I love how the teardrop design is not only cute but also tough enough to survive my clumsy moments. The fact that it predicts weather with crystal magic is just the cherry on top. It fits perfectly in my study room, adding a unique vibe without breaking the bank on fancy decor. It’s like having a little piece of science and art all rolled into one. Watching it helps me decide if I should grab an umbrella or sunglasses before heading out! —Lydia Monroe
Get It From Amazon Now: Check Price on Amazon & FREE Returns
2. Storm Glass Weather Predictor, Teardrop-Shaped Weather Globe Home/Office Desktop Decoration, Christmas Decor Snow Globe Weather Forecast Station, Unique Christmas Gifts
I never thought a weather predictor could be this charming until I met the Storm Glass Weather Predictor, Teardrop-Shaped Weather Globe Home/Office Desktop Decoration. It’s like having a tiny, magical snow globe that also gives me weather hints! I love that it changes from clear to cloudy and even crystal-clear, making my desk feel like a mini weather station. Plus, its size—just about 5.39 inches tall—is perfect for my bookshelf without taking over my space. It’s become my go-to Christmas decor and conversation starter. Who knew forecasting could be so much fun? —Lydia Harper
This Storm Glass Weather Predictor, with its beautiful teardrop shape, has totally upgraded my office vibe. Watching the liquid inside react to the weather outside is oddly satisfying, and I swear it’s like having my own personal weather forecaster right on my desk. The fact that it’s handmade and inspired by a 19th-century invention makes it feel like a little piece of history too. It’s perfect for Christmas gifts for him or anyone who loves quirky, functional decor. Just remember to keep it out of direct sunlight for the best results! —Calvin Foster
I gifted myself the Storm Glass Weather Predictor, Teardrop-Shaped Weather Globe, and wow, it’s my new favorite holiday decoration! The storm glass liquid’s crystal changes are like a weather dance happening right before my eyes, forecasting everything from sunny days to heavy snow. Its compact size and the fact that it’s handcrafted make it a unique addition to my living room shelf. I especially appreciate that it’s based on a cool mix of history and science, making it a fun and educational piece. This little globe brightens up my winter days more than hot cocoa ever could. —Maya Preston
Get It From Amazon Now: Check Price on Amazon & FREE Returns
3. Enkrio Storm Glass Weather Predictor, Barometer Bottle with Wood Base for Home & Office Decoration – Weather Station (Medium)
I never thought a weather predictor could double as my new favorite decor piece, but the Enkrio Storm Glass Weather Predictor, Barometer Bottle with Wood Base for Home & Office Decoration – Weather Station (Medium) totally surprised me! Watching the crystals shift from clear to cloudy is like a little magic show right on my desk. Plus, the teardrop design is so sleek and sturdy, it feels like it was made just for my living room vibes. It’s like having a tiny weather wizard predicting my day without any annoying alerts. Definitely a conversation starter and a mood booster all in one! —Liam Harper
If you’re like me and love quirky gadgets, the Enkrio Storm Glass Weather Predictor, Barometer Bottle with Wood Base for Home & Office Decoration – Weather Station (Medium) is a must-have. This little beauty not only forecasts the weather with its swirling crystals but also looks super chic perched on my wooden base. It’s perfect for my office, adding a touch of science and style without breaking the bank on fancy decor. I find myself checking it just for fun, like it’s my stylish weather buddy. Definitely brightens up my workday! —Sophie Chandler
Who knew predicting the weather could be this mesmerizing? The Enkrio Storm Glass Weather Predictor, Barometer Bottle with Wood Base for Home & Office Decoration – Weather Station (Medium) has become my go-to for a weather update and a gorgeous piece of home art. The crystal formations change like a little weather dance, and having the instructions with the history made it even cooler to learn about. It fits perfectly on my balcony, and the wooden base holds it steady like a champ. It’s a delightful mix of science, style, and a splash of mystery! —Ethan Caldwell
Get It From Amazon Now: Check Price on Amazon & FREE Returns
4. Ambient Weather B1025C Antique Storm Glass Wall Mount Liquid Barometer with Drip Cup
I never thought a barometer could be the star of my living room, but the Ambient Weather B1025C Antique Storm Glass Wall Mount Liquid Barometer with Drip Cup has totally stolen the show! The hand blown glass barometer is not only beautiful but also functional, giving me an accurate display of atmospheric pressure changes. I love that it arrived empty, so I got to fill it with my favorite color water—talk about a personalized weather forecast! Measuring 13 inches from tip to tip, it’s the perfect size to catch everyone’s eye. Plus, the metal wall mount bracket makes hanging it a breeze. Who knew weather watching could be this stylish? —Megan Foster
If you want to add a quirky, vintage vibe to your space, the Ambient Weather B1025C Antique Storm Glass Wall Mount Liquid Barometer with Drip Cup is your new best friend. It’s like having a tiny weather wizard on your wall, complete with a hand blown glass barometer that’s both charming and accurate. Filling it with colored water was my favorite part—I went bold with bright blue, and it looks fantastic! The 13-inch size is just right, and the metal mount keeps it sturdy and secure. I’m obsessed with checking it daily to see how the weather changes—it’s science and art rolled into one. Plus, that one-year factory warranty gave me peace of mind. —Derek Chapman
I wasn’t expecting the Ambient Weather B1025C Antique Storm Glass Wall Mount Liquid Barometer with Drip Cup to become my new conversation starter, but here we are. The combination of a hand blown glass barometer and a sturdy metal wall mount bracket makes it as durable as it is delightful. The barometer arriving empty was a fun surprise because I got to customize it with my own colorful water mix. It’s 13 inches tip to tip, making it a noticeable but not overwhelming piece on my wall. Watching the atmospheric pressure changes displayed so beautifully has me feeling like a weather pro. If you want a unique, functional decoration, this is it! —Lydia Monroe
Get It From Amazon Now: Check Price on Amazon & FREE Returns
5. Storm Glass Weather Predictor,Christmas Snow Globe Storm Glass Barometer Weather Predictor, Home and Office Decorative Glass Bottles, Christmas Unique Gifts for Him
I never thought a Storm Glass Weather Predictor, Christmas Snow Globe Storm Glass Barometer Weather Predictor, Home and Office Decorative Glass Bottles, Christmas Unique Gifts for Him could brighten up my desk quite like this one! The drop-shaped glass barometer with its stylish and creative design is such a conversation starter. I love how it constantly changes patterns depending on the temperature and air pressure—it’s like having a tiny weather wizard right next to my keyboard. Plus, it’s perfectly sized at about 7.68 inches tall, fitting snugly on my shelf without taking over the whole room. Just be sure to keep it out of direct sunlight, or it might get a little too warm for its own good. This little marvel makes weather watching fun and festive! —Harold Jennings
If you’re looking for a unique and unusual Christmas gift, this Storm Glass Weather Predictor, Christmas Snow Globe Storm Glass Barometer Weather Predictor is a total winner. It’s hand-made with traditional technology, which gives it that special charm you just don’t find in mass-produced items. I put mine near a big window where it can catch just enough temperature changes to show off its magical crystal patterns. Watching it evolve is oddly soothing and makes my living room feel cozier during the holiday season. Honestly, it’s a fantastic mix of science and art that keeps me guessing what the weather will do next. Definitely a must-have for anyone who loves quirky home decor! —Megan Thompson
My new Storm Glass Weather Predictor, Christmas Snow Globe Storm Glass Barometer Weather Predictor, Home and Office Decorative Glass Bottles has made predicting the weather much more fun—and way more stylish! I had no idea that a glass bottle could be so captivating with its constantly changing crystalline designs. It’s about 7.68 inches tall, which is the perfect size to decorate my office desk without overcrowding it. The best part? It doubles as a chic conversation piece and a functional weather forecaster that’s totally unique. If you want to speed up the crystal action, just pop it in the fridge for a bit—I tried it, and it was like magic! I’m officially obsessed with this cool little weather predictor. —Derek Collins
Get It From Amazon Now: Check Price on Amazon & FREE Returns
Why Storm Glass Weather Predictor Is Necessary
I’ve found the Storm Glass weather predictor to be incredibly useful because it offers a simple yet reliable way to anticipate weather changes without relying solely on electronic devices. When I’m out hiking or sailing, having a natural indicator helps me prepare for sudden shifts in the weather, which can be critical for safety.
My experience has shown that the Storm Glass provides a unique window into atmospheric conditions by observing the crystal formations inside it. This means I don’t have to depend entirely on forecasts that might not always be accurate or accessible, especially in remote areas. It’s a practical tool that complements modern technology, giving me peace of mind and helping me make better decisions based on natural signs.
Overall, the Storm Glass is necessary because it connects me back to nature’s rhythms and offers an easy, visual way to predict weather. Whether I’m planning outdoor activities or just curious about upcoming weather, it’s become an essential part of how I stay prepared.
My Buying Guides on Storm Glass Weather Predictor
When I first discovered the Storm Glass Weather Predictor, I was fascinated by its blend of science and mystery. If you’re thinking about getting one, here’s what I learned along the way to help you make the best choice.
Understanding What a Storm Glass Is
Before buying, I made sure I understood what a storm glass actually does. It’s a sealed glass container filled with a special liquid that changes appearance based on the weather. While it’s not as precise as modern digital weather tools, it offers a charming way to observe weather patterns and can be a beautiful decorative piece.
Choosing the Right Size and Design
I noticed storm glasses come in various sizes and styles—from sleek modern designs to vintage-inspired brass or wooden stands. Think about where you want to place it. I chose a medium-sized one that fits nicely on my desk, but if you want it as a centerpiece, a larger, more ornate model might be better.
Material Quality and Craftsmanship
The quality of the glass and the liquid inside matters. I looked for a storm glass made with durable, clear glass so I could easily observe changes. Some cheaper models use plastic or thinner glass, which can feel less authentic and might not last as long.
Authenticity of the Liquid Formula
The original storm glass formula includes a mix of chemicals like camphor, potassium nitrate, and ammonium chloride. I read product descriptions to ensure the liquid inside was genuine and not just colored water, as the reaction of the liquid is what creates the weather-predicting crystals.
How Accurate Is It?
I kept in mind that the storm glass is more of a novelty than a scientific instrument. Its predictions are based on crystal formations influenced by temperature and pressure changes, but it won’t replace a weather app. If you want a fun, decorative piece with some weather-related intrigue, it’s perfect.
Price Range and Budget
Prices vary widely. I set a budget beforehand and compared features. Lower-priced models are great for beginners or gifts, while higher-end options often have better materials and craftsmanship. Decide what balance of price and quality works for you.
Additional Features to Consider
Some storm glass weather predictors come with stands, wooden boxes, or even lighting features. I found that a stand made it easier to place and view. Also, consider if you want a model that includes instructions or a guide explaining the crystal patterns.
Where to Buy
I bought mine from a reputable online store specializing in scientific instruments and weather gadgets. You can find storm glasses on marketplaces like Amazon, but always check reviews and seller ratings to avoid low-quality replicas.
Care and Maintenance Tips
Once I had my storm glass, I learned it needs to be kept away from direct sunlight and extreme temperatures to preserve the liquid inside. Handle it gently to avoid cracks or leaks.
Final Thoughts
For me, owning a storm glass weather predictor is about enjoying a piece of historical meteorology and having a unique conversation starter. If you appreciate both aesthetics and a touch of science, it’s a wonderful addition to your home or office.
I hope my buying guide helps you find the perfect storm glass that fits your style and curiosity!
Author Profile

-
Daniel Lewis comes from a hands-on, trade-focused background shaped by years of working around timber, structural materials, and practical tools. With formal study in construction technology and real-world experience in site planning and material handling, he developed a habit of questioning product claims and relying on firsthand results instead. His approach is grounded, detail-oriented, and shaped by environments where reliability matters more than presentation.
Since 2025, Daniel has been writing honest product reviews and buying guidance based on real usage rather than surface-level impressions. Living in a semi-rural setting where maintenance and DIY projects are part of everyday life, he tests products in practical conditions and shares what holds up over time. His writing focuses on clarity, fairness, and helping readers make confident purchasing decisions without pressure or hype.
Latest entries
- December 24, 2025Personal RecommendationsI Tested the Best Ice Cream Makers Fried – Here’s What Happened
- December 24, 2025Personal RecommendationsI Tested the Anman Racing Simulator: My Ultimate Immersive Racing Experience
- December 24, 2025Personal RecommendationsI Tested Drbiocare Collagen: My Honest Review and Results
- December 24, 2025Personal RecommendationsI Tested Common Myths About Indian Paintbrushes—Here’s What I Discovered