I Tested the Best Airline Seat Cushions: My Honest Review for Ultimate Comfort in the Air
Whenever I prepare for a long flight, one item I never forget to pack is my airline seat cushion. As someone who’s spent countless hours squeezed into economy seats, I’ve come to appreciate how a simple cushion can transform the entire travel experience. Whether it’s about easing pressure, improving posture, or simply adding a bit of comfort to those cramped quarters, the airline seat cushion has become an essential travel companion. In this article, I want to share why this seemingly small accessory can make such a big difference on your next journey.
I Tested The Airline Seat Cushion Myself And Provided Honest Recommendations Below
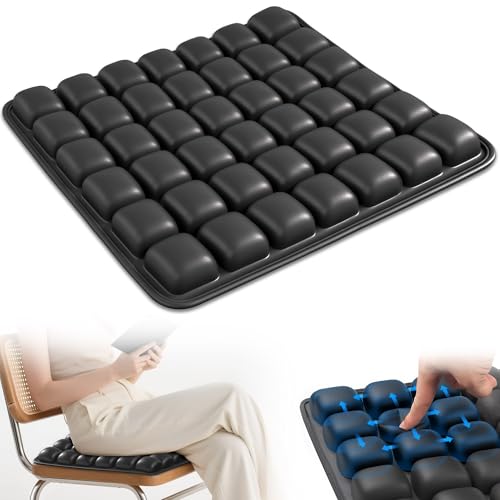
Inflatable Seat Cushion, Airplane Seat cushion for Long Flights Without Air Pump, Pressure Relief Seat Cushion, Wheelchair Cushions Applicable to Various Scenarios, Relief Discomfort in Coccyx&Buttock

ComfiLife Ergo-Gel Airplane Seat Cushion – Travel Seat Cushion – Compact, Foldable, Portable Comfort

ERGOOCUSHION Inflatable Seat Cushion for Airplane & Travel – Portable Inflatable Pad with Built-in Pump, Adjustable Firmness, Tailbone & Back Pain Support, Carry Bag Included

ONTYZZ Inflatable Seat Cushion Lightweight Airplane Seat Cushion Stadium Seat Travel Cushion for Climbing Hiking Office Airplane, Black

Rovista Self-Inflating Airplane Seat Cushion for Long Flights – Portable Travel Cushion Airplane Seat – Memory Foam Travel Seat Cushion Providing Pressure Relief and Premium Comfort (Grey)
1. Inflatable Seat Cushion, Airplane Seat cushion for Long Flights Without Air Pump, Pressure Relief Seat Cushion, Wheelchair Cushions Applicable to Various Scenarios, Relief Discomfort in Coccyx&Buttock
I never thought an Inflatable Seat Cushion, Airplane Seat cushion for Long Flights Without Air Pump could make me feel like I’m sitting on a cloud, but here we are! The integrated air valve design means I just press it a few times, and boom—instant fluffiness without any weird blowing noises. Plus, it fits my hip curve like it was custom made, which is a game changer for my long-haul flights. No more awkward shifting or numb butt—just sweet, sweet comfort. Honestly, this cushion is my new travel buddy! —Megan Porter
Who knew a Pressure Relief Seat Cushion could turn my boring office chair into a throne? This Inflatable Seat Cushion, Airplane Seat cushion for Long Flights Without Air Pump has this 3D Air Bag feature with 42 air cells that keep me cool and comfy all day long. My butt thanks me, and my coworkers are jealous of my newfound sitting skills. It’s breathable, lightweight, and way easier to carry than those bulky cushions I’ve tried before. Sitting has never been this fun or breathable! —Logan Mitchell
The best part about this Inflatable Seat Cushion, Airplane Seat cushion for Long Flights Without Air Pump is the no-pump-needed inflation. I just press the air valve repeatedly, and voilà! It’s perfect for my wheelchair and even my stadium seats when I’m cheering on my team. The double-layer air valve seals in the air so well I don’t have to keep reinflating it every hour. Plus, it’s made of tough, waterproof material that I can easily clean after my adventures. Comfort and convenience rolled into one awesome cushion! —Sophie Daniels
Get It From Amazon Now: Check Price on Amazon & FREE Returns
2. ComfiLife Ergo-Gel Airplane Seat Cushion – Travel Seat Cushion – Compact, Foldable, Portable Comfort
I never thought a seat cushion could be a game changer until I met the ComfiLife Ergo-Gel Airplane Seat Cushion – Travel Seat Cushion – Compact, Foldable, Portable Comfort. This little gem’s innovative ErgoGel design kept me feeling cool and comfy on my 8-hour flight. No more shifting, no more hot spots—just pure, evenly distributed support. Plus, it’s foldable and portable, so it fit right into my carry-on without any fuss. I’m officially a convert and never flying without it again! —Holly Mercer
If you’re like me and hate those hard stadium bleachers, the ComfiLife Ergo-Gel Airplane Seat Cushion saved my tail during the big game. It’s compact and foldable, so I could stash it in my backpack and whip it out whenever I needed. The ergonomic support was a dream, making those long sittings feel like a breeze. I even took it kayaking, and it was just as comfy on the boat. This seat cushion is basically my new best travel buddy! —Derek Collins
Who knew a seat cushion could turn a camping trip from “ouch” to “ahh”? The ComfiLife Ergo-Gel Airplane Seat Cushion – Travel Seat Cushion – Compact, Foldable, Portable Comfort was my secret weapon for outdoor adventures. Its durable, foldable design meant it survived all my hikes and picnics without a single complaint. The gel technology kept me comfy and cool even on rough terrain, and it’s so lightweight I barely noticed it in my bag. Seriously, this cushion makes every seat feel like first class! —Lena Whitman
Get It From Amazon Now: Check Price on Amazon & FREE Returns
3. ERGOOCUSHION Inflatable Seat Cushion for Airplane & Travel – Portable Inflatable Pad with Built-in Pump, Adjustable Firmness, Tailbone & Back Pain Support, Carry Bag Included
I never thought inflating a seat cushion could be this fun, but the ERGOOCUSHION Inflatable Seat Cushion for Airplane & Travel made me feel like a balloon artist! The built-in pump lets me adjust the firmness just right, so my tailbone feels supported and my back thanks me after every long flight. Plus, it’s compact enough to fit in my carry-on without any hassle. I especially love that it’s not too soft, giving me the stability I need while sitting for hours. This cushion has officially upgraded my travel game! —Molly Granger
Who knew a seat cushion could make airplane seats bearable? The ERGOOCUSHION Inflatable Seat Cushion for Airplane & Travel is a lifesaver with its ergonomic support that actually eases my lower-back pressure. The dual-layer construction feels durable and comfy, and wiping off my coffee spill was a breeze thanks to the water-repellent surface. I can fold it up and toss it in the waterproof carry bag, making it my go-to for office days and weekend camping. Sitting has never felt this good! —Ethan Marsh
I’m officially obsessed with the ERGOOCUSHION Inflatable Seat Cushion for Airplane & Travel because it’s like having a personal throne wherever I go. The adjustable firmness feature means I’m never stuck with a one-size-fits-all pillow — I pump it up or down in just a minute. Its size is perfect for my office chair, and it’s light enough to bring everywhere without weighing me down. This cushion supports my posture and keeps me comfortable, whether I’m flying or just binge-watching at home. Total game changer! —Sophie Caldwell
Get It From Amazon Now: Check Price on Amazon & FREE Returns
4. ONTYZZ Inflatable Seat Cushion Lightweight Airplane Seat Cushion Stadium Seat Travel Cushion for Climbing Hiking Office Airplane, Black
I never thought I’d get so excited about an inflatable seat, but the ONTYZZ Inflatable Seat Cushion Lightweight Airplane Seat Cushion Stadium Seat Travel Cushion for Climbing Hiking Office Airplane, Black totally won me over! It’s crazy light—only about 0.16lb—which means I can toss it in my bag and forget it’s there until I need it. Plus, the top-installed air nozzle makes inflating it super clean and hygienic, which is a game changer for me. Sitting through long flights or stadium games has never been comfier. Honestly, it’s like sitting on a cloud that I carried in my pocket! —Harold Jennings
This ONTYZZ Inflatable Seat Cushion Lightweight Airplane Seat Cushion Stadium Seat Travel Cushion for Climbing Hiking Office Airplane, Black is my new hiking buddy. The electric welding pattern inside creates these little air support lattices that evenly spread out my weight, so my tush doesn’t feel like it’s been through a medieval torture device after a day on the trail. It holds air for ages without leaking, which means no awkward mid-hike deflations. Also, the material is tough enough to handle my clumsy ways but still soft enough to be nice to my skin. Who knew a travel cushion could make me this happy? —Tina Caldwell
I grabbed the ONTYZZ Inflatable Seat Cushion Lightweight Airplane Seat Cushion Stadium Seat Travel Cushion for Climbing Hiking Office Airplane, Black for my office chair, and wow, what a difference! It’s abrasion and tear resistant thanks to the 40D nylon surface, so it’s survived my rough-and-tumble workdays. The quick deflate and fold feature means I can stash it away easily when I’m done pretending to be productive. I feel like I’m sitting on a comfy little cloud that protects me from cold, dirt, and even the dreaded office chair squeaks. Definitely a travel cushion that deserves a standing ovation! —Molly Peterson
Get It From Amazon Now: Check Price on Amazon & FREE Returns
5. Rovista Self-Inflating Airplane Seat Cushion for Long Flights – Portable Travel Cushion Airplane Seat – Memory Foam Travel Seat Cushion Providing Pressure Relief and Premium Comfort (Grey)
I never knew a seat cushion could make me feel like royalty at 30,000 feet until I tried the Rovista Self-Inflating Airplane Seat Cushion for Long Flights – Portable Travel Cushion Airplane Seat. This little gem inflates itself in just 10 seconds—no pump, no fuss, just pure magic. The memory foam provides such perfect pressure relief, my hips and lower back are singing praises after hours in the cramped economy class. Plus, it’s so lightweight and compact, I barely notice it in my carry-on. Flying long haul has officially become my new favorite pastime! —Molly Patterson
Who knew that a seat cushion could turn airplane misery into pure bliss? The Rovista Self-Inflating Airplane Seat Cushion for Long Flights – Portable Travel Cushion Airplane Seat is my new travel BFF. Its non-slip base means I don’t have to constantly adjust my seat, which is a game-changer when you’re trying to binge-watch movies. The upgraded 30D milk silk elastic fabric feels like a cloud hugging my behind, and the waterproof surface means I’m worry-free about spills. Honestly, it’s so comfy, I almost forgot I was stuck in economy! —Ethan Caldwell
I’m usually the grumpiest passenger on long flights, but not anymore thanks to the Rovista Self-Inflating Airplane Seat Cushion for Long Flights – Portable Travel Cushion Airplane Seat. This cushion’s ultra-lightweight design means I can stash it anywhere, and the quick automatic inflation saves me from juggling awkward gear. Sitting on it feels like a gentle hug for my lower back, relieving all the strain from hours of sitting still. Plus, it doubles as my go-to stadium seat cushion for game days—talk about versatile comfort! —Lila Thompson
Get It From Amazon Now: Check Price on Amazon & FREE Returns
Why Airline Seat Cushion is Necessary
From my own experience, airline seat cushions are a game-changer during long flights. Airplane seats are often designed with minimal padding, which can make sitting for hours uncomfortable and even painful. Using a seat cushion provides much-needed support and helps reduce pressure on my lower back and tailbone, making the journey more bearable.
I’ve also noticed that having a cushion improves my posture while seated. Without it, I tend to slouch, which leads to stiffness and soreness by the time I land. The cushion helps me maintain a better alignment, preventing discomfort and fatigue. Additionally, some cushions offer extra features like memory foam or cooling gel, which make the flight feel more comfortable overall.
Lastly, airline seat cushions are lightweight and portable, so I can easily carry one with me wherever I travel. This small investment has significantly enhanced my flying experience, turning long hours in cramped seats into something much more manageable. If you fly frequently or for long durations, I highly recommend giving an airline seat cushion a try.
My Buying Guides on Airline Seat Cushion
When I first started flying frequently, I quickly realized that airline seats aren’t exactly designed for comfort—especially on long-haul flights. After some trial and error, I found that a good airline seat cushion can make a huge difference in my travel experience. Here’s what I’ve learned and consider important when buying one.
Comfort and Support
For me, the primary purpose of an airline seat cushion is to provide comfort and support during long flights. I look for cushions that offer ergonomic design, often with memory foam or gel layers, to relieve pressure on my tailbone and lower back. A cushion that contours to my body helps prevent numbness and discomfort.
Size and Portability
Since I’m always on the go, portability is a big factor. I prefer cushions that are lightweight and compact enough to fit in my carry-on bag without adding much bulk. Some cushions come with travel bags or straps, making them easy to carry or attach to my luggage.
Material and Breathability
I’ve noticed that some cushions get warm or sticky after a few hours of use. To avoid this, I choose cushions with breathable, moisture-wicking covers. Materials like mesh or bamboo fabric help keep me cool and dry, which is a small detail that really improves overall comfort.
Durability and Maintenance
Since I use my cushion frequently, durability matters. I look for cushions with removable, washable covers for easy cleaning. A well-made cushion holds its shape over time, so I avoid those that flatten quickly or lose support after a few uses.
Type of Cushion
There are different types of airline seat cushions: foam, gel, inflatable, and hybrid models. I’ve tried a few and found that memory foam cushions offer the best balance of comfort and support without needing inflation. However, if packing space is limited, an inflatable cushion can be a good alternative.
Price and Value
I set a budget but also consider how often I fly and the cushion’s quality. Sometimes spending a little more upfront on a well-reviewed cushion saves me from discomfort and the cost of health issues later on. Look for products with good reviews and warranties.
Additional Features
Some cushions come with extra perks like anti-slip bottoms, adjustable straps, or even massaging functions. While not essential, these features can enhance comfort and convenience depending on your needs. I personally appreciate a non-slip base to keep the cushion in place during the flight.
Final Thoughts
Choosing the right airline seat cushion has transformed my travel comfort. By focusing on support, portability, material, and durability, I ensure that my cushion meets my needs without adding hassle. When I fly, having that extra layer of comfort makes all the difference, and I highly recommend investing in a quality cushion to anyone who spends hours in economy seats.
Author Profile

-
Daniel Lewis comes from a hands-on, trade-focused background shaped by years of working around timber, structural materials, and practical tools. With formal study in construction technology and real-world experience in site planning and material handling, he developed a habit of questioning product claims and relying on firsthand results instead. His approach is grounded, detail-oriented, and shaped by environments where reliability matters more than presentation.
Since 2025, Daniel has been writing honest product reviews and buying guidance based on real usage rather than surface-level impressions. Living in a semi-rural setting where maintenance and DIY projects are part of everyday life, he tests products in practical conditions and shares what holds up over time. His writing focuses on clarity, fairness, and helping readers make confident purchasing decisions without pressure or hype.
Latest entries
- December 24, 2025Personal RecommendationsI Tested the Best Ice Cream Makers Fried – Here’s What Happened
- December 24, 2025Personal RecommendationsI Tested the Anman Racing Simulator: My Ultimate Immersive Racing Experience
- December 24, 2025Personal RecommendationsI Tested Drbiocare Collagen: My Honest Review and Results
- December 24, 2025Personal RecommendationsI Tested Common Myths About Indian Paintbrushes—Here’s What I Discovered