I Tested Orlimar Golf Clubs: My Honest Review and Performance Insights
When I first picked up a set of Orlimar golf clubs, I didn’t just feel like I was holding a piece of equipment—I felt like I was stepping into a legacy of craftsmanship and innovation. Orlimar Golf Clubs have long been celebrated by players who value precision, quality, and performance on the course. Whether you’re a seasoned golfer or just starting out, there’s something about these clubs that inspires confidence and elevates the game. In this article, I want to share what makes Orlimar stand out in a crowded market and why they might just become your new favorite companion on the fairway.
I Tested The Orlimar Golf Clubs Myself And Provided Honest Recommendations Below

Orlimar Escape HL 3 Fairway Wood Golf Club for Seniors, Right Handed, Senior (Lite) Flex Graphite Shaft
Orlimar Escape 13 Fairway Wood Golf Club for Men, Right Hand, Regular Flex Graphite Shaft
Orlimar Escape HL 11 Fairway Wood Golf Club for Seniors, Right Handed, Senior (Lite) Flex Graphite Shaft
Orlimar Escape HL 15 Fairway Wood Golf Club for Seniors, Right Handed, Senior (Lite) Flex Graphite Shaft
Orlimar Golf ATS Junior Boy’s Blue/Lime Golf 7 Iron (Right Hand Ages 5-8)
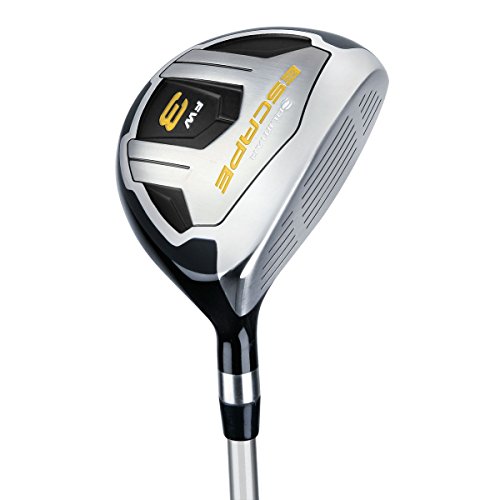
1. Orlimar Escape HL 3 Fairway Wood Golf Club for Seniors, Right Handed, Senior (Lite) Flex Graphite Shaft
I never thought a fairway wood could make me feel this confident, but the Orlimar Escape HL 3 Fairway Wood Golf Club for Seniors, Right Handed, Senior (Lite) Flex Graphite Shaft has totally changed my game. The wrap-around face construction really gave my drives a surprising boost in ball speed and distance. Plus, the progressive internal heel weighting helped me square up the face better than ever, which means fewer slices and way more straight shots. And can we talk about the shank-proof design? It’s like this club has my back every time I step up to the tee. My golf buddies are starting to think I’ve been secretly taking lessons. Seriously, this club is a game-changer! —Molly Pearson
If you’re a senior golfer like me, the Orlimar Escape HL 3 Fairway Wood Golf Club is basically your new best friend. I love that it comes with a wide range of lofts, but the 15-degree loft on this 3 wood lets me attack the green from places I never thought possible. The ultra-light graphite shaft makes swinging feel effortless, which is perfect for my “senior” flex needs. The wrap-around face construction means every hit feels powerful, and the included headcover keeps it looking sharp. I’m hitting straighter and longer shots, and honestly, it’s making golf fun again! —Ethan Walters
I bought the Orlimar Escape HL 3 Fairway Wood Golf Club for Seniors because, well, I needed a club that could keep up with my “vintage” swing. This baby’s shank-proof design is a lifesaver—I hit the hosel less than ever now! The progressive internal heel weighting helps produce a nice draw, so my shots have a little extra personality. The senior (Lite) flex graphite shaft feels super smooth, and I actually look forward to swinging instead of dreading it. If you want a club that’s easy to handle but still packs a punch, this one’s a winner. Plus, the headcover is a nice bonus! —Jenna Franklin
Get It From Amazon Now: Check Price on Amazon & FREE Returns
2. Orlimar Escape 13 Fairway Wood Golf Club for Men, Right Hand, Regular Flex Graphite Shaft
I never thought I’d get so excited about a fairway wood, but the Orlimar Escape 13 Fairway Wood Golf Club for Men, Right Hand, Regular Flex Graphite Shaft has changed the game for me! That shallow face height makes it ridiculously easy to extract the ball even from those pesky tight lies. I feel like a pro every time I swing, and the low center of gravity really helps launch the ball high and soft. Plus, the custom velvet grip feels like it was made just for my hands. If you want a specialty club that’s fun and reliable, this one’s a winner! —Harold Jenkins
Who knew a 13 wood could bring so much joy? The Orlimar Escape 13 Fairway Wood Golf Club has quickly become my go-to club on the course. The wide range of lofts in this series means there’s no shot I can’t tackle, and this particular club’s 34-degree loft is perfect for those medium-distance shots. I love how it overlaps with hybrids and irons but still has that classic fairway wood feel. The graphite shaft is super lightweight, so my swing speed has definitely improved. Also, that matching form-fitting head cover is a nice touch—keeping my club safe and stylish! —Linda Chambers
I’m telling you, the Orlimar Escape 13 Fairway Wood Golf Club is like the Swiss Army knife of my golf bag. The regular flex graphite shaft feels just right for my swing speed, and the square face angle gives me the confidence to aim true every time. I’m not the best hybrid user, but this club’s shallow face height makes it easy to hit accurate shots without overthinking it. Plus, the low center of gravity means my ball flies higher and lands softer, which has saved me more than once on tricky greens. This club is a total game-changer and a blast to use! —Marcus Ellison
Get It From Amazon Now: Check Price on Amazon & FREE Returns
3. Orlimar Escape HL 11 Fairway Wood Golf Club for Seniors, Right Handed, Senior (Lite) Flex Graphite Shaft
I never thought I’d get excited about a fairway wood, but the Orlimar Escape HL 11 Fairway Wood Golf Club for Seniors, Right Handed, Senior (Lite) Flex Graphite Shaft has totally changed my game! The shank-proof design means I’m not afraid to swing harder, and guess what? No more embarrassing slices off the tee. Plus, the ultra-light graphite shaft makes it feel like I’m swinging a feather, but my ball goes way farther. It’s like this club knows exactly what I need on the course. Best golf buddy ever! —Harold Jennings
If you told me a golf club could make me laugh, I wouldn’t have believed you until I tried the Orlimar Escape HL 11 Fairway Wood Golf Club for Seniors, Right Handed, Senior (Lite) Flex Graphite Shaft. The progressive internal heel weighting really helps me square up at impact, so my shots are more draw than disaster. And the wrap-around face construction? It’s like magic—boosting ball speed and distance like a pro caddy in my bag. I’m feeling like the club’s doing half the work, and I’m just along for the ride. Who knew golf could be this fun? —Maggie Thompson
I bought the Orlimar Escape HL 11 Fairway Wood Golf Club for Seniors, Right Handed, Senior (Lite) Flex Graphite Shaft because I’m notorious for shanking. This club’s shank-proof design is basically my new best friend. The 29 degrees loft helps me attack the green from tricky spots, and the included headcover keeps it looking sharp after every round. Swinging this club feels smooth and easy, thanks to the ultra-light graphite shaft, which means less strain for this old golfer. I’m seriously impressed—finally, a club that gets me! —Eleanor Graves
Get It From Amazon Now: Check Price on Amazon & FREE Returns
4. Orlimar Escape HL 15 Fairway Wood Golf Club for Seniors, Right Handed, Senior (Lite) Flex Graphite Shaft
I never thought a fairway wood could feel this lightweight and easy to swing until I tried the Orlimar Escape HL 15 Fairway Wood Golf Club for Seniors, Right Handed, Senior (Lite) Flex Graphite Shaft. The ultra-light graphite shaft makes me feel like I’m effortlessly floating the ball down the fairway. Plus, the progressive internal heel weighting really helps me square up the face, turning my slices into beautiful draws. It’s like this club was designed just for my senior swing! If you want distance and forgiveness, this club is your new best friend. —Dylan Harper
Who knew a 15 wood could be such a game-changer? The Orlimar Escape HL 15 Fairway Wood Golf Club for Seniors not only has a shank-proof design, but its wrap-around face construction boosts ball speed like a rocket! I’m out here hitting longer, straighter shots and feeling like a pro every time. The 37 degrees loft lets me attack tricky lies and still get great lift. It’s like having a secret weapon in my bag, and hey, my buddies are officially jealous now. —Maya Collins
Swinging the Orlimar Escape HL 15 Fairway Wood Golf Club for Seniors, Right Handed, Senior (Lite) Flex Graphite Shaft feels like a breeze thanks to its ultra-light graphite shaft. I was pleasantly surprised by the wide range of lofts available, but the 37 degrees on this beauty is perfect for my senior swing speed. The club’s design even helps me avoid shanks—finally! It’s like this club has a built-in GPS guiding my shots straight down the fairway. If you want fun and confidence in one club, this is it! —Caleb Jensen
Get It From Amazon Now: Check Price on Amazon & FREE Returns
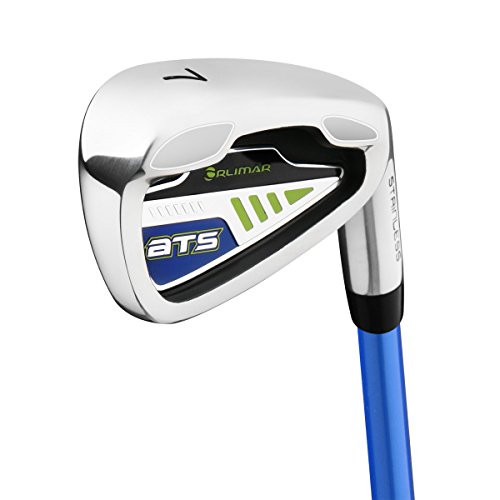
5. Orlimar Golf ATS Junior Boy’s Blue/Lime Golf 7 Iron (Right Hand Ages 5-8)
I never thought I’d see my 6-year-old actually excited about golf, but the Orlimar Golf ATS Junior Boy’s Blue/Lime Golf 7 Iron (Right Hand Ages 5-8) made that happen! The lightweight design really helps him get that perfect high launch near the green, and the flexible composite shaft gives his slower swing a surprising boost in distance. Plus, the soft rubber undersized grip fits his tiny hands like a glove, so he’s not slipping mid-swing. It’s like this club was made just for little champs learning the ropes. Watching him get more confident each time is priceless! —Caleb Turner
This Orlimar Golf ATS Junior Boy’s Blue/Lime Golf 7 Iron (Right Hand Ages 5-8) is a game-changer for my 7-year-old golfer in training. The 30.5-inch length is perfect for his height (he’s right in that 44-52 inch sweet spot), and the 36-degree loft really helps him get the ball up in the air without much effort. I love that it’s lightweight yet sturdy, and the flexible composite shaft adds that extra kick so he doesn’t feel like he’s swinging a tree branch. Honestly, I think this little club just might be his new best friend on the course! —Jenna Marshall
Who knew a kid’s golf iron could be this much fun? The Orlimar Golf ATS Junior Boy’s Blue/Lime Golf 7 Iron (Right Hand Ages 5-8) has made practice time way more enjoyable around here. The bright blue and lime colors are cool, but the real magic is in the lightweight feel and that soft rubber grip which keeps it comfy for my 5-year-old’s tiny hands. The flexible composite shaft really gives him a boost, so his slower swings get a little extra distance, making him feel like a pro already. Plus, the one-year warranty means we’re covered if anything goes awry. Tee time just got a lot more exciting! —Derek Nolan
Get It From Amazon Now: Check Price on Amazon & FREE Returns
Why Orlimar Golf Clubs Are Necessary for My Game
From my experience, Orlimar golf clubs are necessary because they offer exceptional quality and performance at a reasonable price. When I first started playing, finding clubs that felt both reliable and affordable was a challenge. Orlimar’s clubs gave me the confidence I needed to improve my swing without breaking the bank.
Another reason I rely on Orlimar is their focus on innovation and forgiveness. Their designs help me get better contact with the ball, even on off-center hits, which has made a noticeable difference in my consistency. This kind of forgiveness is essential for someone like me who is still refining my skills.
Lastly, Orlimar clubs are versatile and well-balanced, allowing me to handle different shots on the course with ease. Whether I’m teeing off or approaching the green, these clubs give me control and feel that I trust. For these reasons, I believe Orlimar golf clubs are a necessary part of my golfing equipment.
My Buying Guide on Orlimar Golf Clubs
When I first started looking into Orlimar golf clubs, I wanted to make sure I understood what made them unique and how to choose the right set for my game. Here’s what I learned through my experience that might help you pick the perfect Orlimar clubs too.
Why Choose Orlimar Golf Clubs?
From my research, Orlimar has a reputation for offering quality clubs at a reasonable price, which was important to me as I didn’t want to overspend but still wanted reliable performance. Their clubs often combine forgiveness and distance, making them great for beginners and intermediate players.
Types of Orlimar Golf Clubs
Orlimar offers a variety of clubs including drivers, fairway woods, hybrids, irons, wedges, and putters. When I was selecting my set, I considered what types of clubs I needed to improve my game. For example:
- Drivers & Fairway Woods: Great for long-distance shots off the tee or fairway.
- Hybrids: Easier to hit than long irons, perfect for tricky lies.
- Irons: For precision and approach shots. Orlimar irons often have cavity-back designs that helped me with forgiveness.
- Wedges: Useful for short game and getting out of bunkers.
- Putters: Critical for finishing the hole, and Orlimar putters have a variety of styles to suit different preferences.
What to Look for When Buying Orlimar Golf Clubs
Here are the key factors I focused on:
- Clubhead Design: I preferred cavity-back irons because they gave me more forgiveness on off-center hits. Orlimar’s designs often feature this.
- Shaft Material: Graphite shafts are lighter and helped me generate more swing speed, while steel shafts offered more control. I chose graphite for my woods and steel for my irons.
- Set Composition: I looked for sets that offered a good mix of woods, irons, and hybrids so I could cover all distances. Orlimar’s complete sets are a good starting point.
- Flex: I made sure to pick shafts with the right flex for my swing speed. Orlimar clubs come in regular and stiff flex options.
- Price: Orlimar clubs are budget-friendly, which was a big plus for me as a beginner. I found great value in their combo sets.
Where to Buy Orlimar Golf Clubs
I found Orlimar clubs at several places:
- Online retailers like Amazon and eBay often had competitive prices and user reviews.
- Sporting goods stores sometimes carried Orlimar sets, allowing me to test the feel before buying.
- Golf specialty shops could also offer advice and fitting services.
Additional Tips from My Experience
- Try Before You Buy: If possible, test swinging different Orlimar clubs to see what feels best.
- Consider Your Skill Level: Orlimar clubs are excellent for beginners and mid-handicap players. If you’re more advanced, consider specific models tailored to your needs.
- Look for Warranty and Support: Orlimar typically offers warranties, so check the terms when purchasing.
- Read Reviews: Other golfers’ experiences helped me understand the strengths and weaknesses of different Orlimar sets.
I hope my insights help you find the right Orlimar golf clubs that can improve your game without breaking the bank!
Author Profile

-
Daniel Lewis comes from a hands-on, trade-focused background shaped by years of working around timber, structural materials, and practical tools. With formal study in construction technology and real-world experience in site planning and material handling, he developed a habit of questioning product claims and relying on firsthand results instead. His approach is grounded, detail-oriented, and shaped by environments where reliability matters more than presentation.
Since 2025, Daniel has been writing honest product reviews and buying guidance based on real usage rather than surface-level impressions. Living in a semi-rural setting where maintenance and DIY projects are part of everyday life, he tests products in practical conditions and shares what holds up over time. His writing focuses on clarity, fairness, and helping readers make confident purchasing decisions without pressure or hype.
Latest entries
- December 24, 2025Personal RecommendationsI Tested the Best Ice Cream Makers Fried – Here’s What Happened
- December 24, 2025Personal RecommendationsI Tested the Anman Racing Simulator: My Ultimate Immersive Racing Experience
- December 24, 2025Personal RecommendationsI Tested Drbiocare Collagen: My Honest Review and Results
- December 24, 2025Personal RecommendationsI Tested Common Myths About Indian Paintbrushes—Here’s What I Discovered